Easy 4 Ingredient Potato Soup: A Comforting Classic

Introduction to 4 Ingredient Potato Soup

In a culinary world often dominated by complex dishes and lengthy ingredient lists, the 4 ingredient potato soup stands out as a beacon of simplicity and comfort. This dish embodies the principle that less truly can be more, especially when it comes to creating warm, comforting meals that soothe the soul and please the palate with minimal fuss.

The Simplicity and Comfort of Potato Soup

Potato soup, at its core, is a testament to the beauty of simplicity. Made with just potatoes, milk, green onions, and garlic salt, this soup proves that you don’t need a pantry full of ingredients to create a dish that’s rich in flavor and texture. The 4 ingredient potato soup is:

  • Easy to prepare: With only four ingredients, preparation and cooking times are significantly reduced.
  • Comforting: Its creamy texture and warm, inviting flavor make it the perfect comfort food.
  • Versatile: While delicious on its own, it can also serve as a base for adding other ingredients if desired.

The Appeal of Minimal Ingredient Recipes

Minimal ingredient recipes like the 4 ingredient potato soup are gaining popularity for several reasons:

  • Accessibility: Fewer ingredients mean these recipes are more accessible to novice cooks and those with limited pantry supplies.
  • Affordability: With less to buy, these dishes are kind to your grocery budget.
  • Healthier options: Simpler recipes often rely on whole, unprocessed ingredients, making for healthier meal options.

Why Choose 4 Ingredient Potato Soup?

Choosing to make a 4 ingredient potato soup is not just about simplicity or the need for comfort food; it’s also about embracing a cooking philosophy that appreciates the value of each ingredient. This soup allows each component – the creaminess of the potatoes, the richness of the milk, the freshness of the green onions, and the subtle warmth of the garlic salt – to shine through without competition.

Tips for Maximizing Flavor

To ensure your 4 ingredient potato soup is as flavorful as possible:

  • Select the right potatoes: Opt for starchy varieties like Russets or Yukon Golds for the creamiest texture.
  • Enhance with toppings: Though not necessary, consider garnishing with additional green onions, cheese, or bacon bits for added flavor layers.
  • Adjust seasoning carefully: Start with a conservative amount of garlic salt and adjust according to your taste preferences.

Embracing the 4 Ingredient Philosophy

Embracing the 4 ingredient philosophy encourages creativity within constraints, pushing you to make the most out of each ingredient. It teaches the importance of ingredient quality and how simple combinations can lead to the most memorable dishes. The 4 ingredient potato soup is a prime example of how a minimalist approach can lead to maximum flavor, proving that sometimes, the simplest dishes are the most satisfying.

Choosing the Right Potatoes

The choice of potato can dramatically affect the texture, flavor, and overall success of your 4 ingredient potato soup. Since the potato is the star of this dish, understanding the characteristics of different types of potatoes and their impact on your soup is essential.

Starchy vs. Waxy Potatoes

  • Starchy Potatoes: Ideal for soups due to their high starch content, which contributes to a creamier texture. Russets are a prime example, breaking down easily when cooked and lending a silky smoothness to the soup.
  • Waxy Potatoes: Such as Red or New potatoes, are less ideal as they maintain their shape and firmness after cooking, leading to a less creamy texture.

The Best Potatoes for Soup

  • Russet Potatoes: With their fluffy texture and ability to absorb flavors, Russets are perfect for creating a smooth, creamy soup.
  • Yukon Gold Potatoes: Offering a buttery flavor and a slightly creamier texture than Russets, Yukon Golds are another excellent choice for potato soup.

Tips for Selecting and Preparing Potatoes

  • Choose Potatoes Carefully: Look for potatoes that are firm, with no green spots or sprouts.
  • Preparation: Peel the potatoes for a smoother soup, or leave the skin on for added texture and nutrients.
  • Cutting Size: Cut the potatoes into uniform pieces to ensure even cooking.

Why Potato Choice Matters

The right type of potato can enhance the 4 ingredient potato soup by:

  • Improving Texture: A creamy texture is key to a great potato soup. Starchy potatoes break down during cooking, thickening the soup naturally.
  • Enhancing Flavor: Potatoes are not just about texture; they also absorb the flavors of the milk, green onions, and garlic salt, distributing these tastes throughout the dish.
  • Cooking Time: Different types of potatoes can affect cooking times. Starchy potatoes tend to cook faster when boiled, which is ideal for quick and easy soups.

Experimenting with Potato Varieties

While Russets and Yukon Golds are top choices, don’t be afraid to experiment with different varieties to find your personal preference. Each type of potato can add a unique twist to the soup, allowing you to customize the dish to your liking.

Choosing the right potatoes is more than a step in the recipe; it’s a decision that influences the entire cooking process and final outcome of your 4 ingredient potato soup. By selecting the best type for your soup, you ensure a delicious, creamy, and satisfying dish that highlights the simplicity and elegance of using minimal ingredients to achieve maximum flavor.

Milk Options for Creaminess

In crafting the perfect 4 ingredient potato soup, selecting the right type of milk is crucial to achieving the desired creaminess and flavor. Milk not only adds richness but also influences the texture and overall mouthfeel of the soup.

Whole Milk: The Classic Choice

  • Whole Milk: A traditional favorite, whole milk is often chosen for its rich flavor and creamy texture. It’s the go-to option for those seeking a classic, indulgent soup.
  • Benefits: Offers a balance of fat and water content, contributing to a smoother, richer soup without being overly heavy.

Low-Fat and Skim Milk: Lighter Alternatives

  • Low-Fat Milk: For a lighter version of the soup, low-fat milk can be used. It reduces the overall calorie count while still providing some creaminess.
  • Skim Milk: The leanest option, skim milk, cuts down on calories and fat but may result in a less creamy texture. It’s ideal for those prioritizing health or dietary restrictions.
  • Adjustments: To compensate for the reduced creaminess, consider blending a portion of the soup to thicken its base without added fat.

Non-Dairy Milk: Vegan and Lactose-Free Options

  • Almond Milk: Offers a nutty flavor and is a popular choice for dairy-free versions of the soup. Opt for unsweetened varieties to avoid altering the soup’s taste.
  • Coconut Milk: Adds a hint of sweetness and tropical flair, along with a creamy texture. Its richness closely mimics that of whole milk.
  • Soy Milk: A versatile option that closely resembles the consistency of cow’s milk, making it a straightforward substitute.

Enhancing Creaminess without Compromising Flavor

  • Blending: Regardless of the milk choice, blending part of the soup can help achieve a creamier texture.
  • Seasoning Adjustments: Different milks may slightly alter the flavor profile. Taste and adjust seasonings accordingly to maintain a balanced flavor.

Preparing the Soup

When crafting the perfect bowl of 4 ingredient potato soup, the journey begins with simplicity and ends in culinary delight. This section breaks down the essential steps and shares tips for achieving that coveted texture, making every spoonful a testament to comfort food done right.

Step-by-Step Cooking Instructions

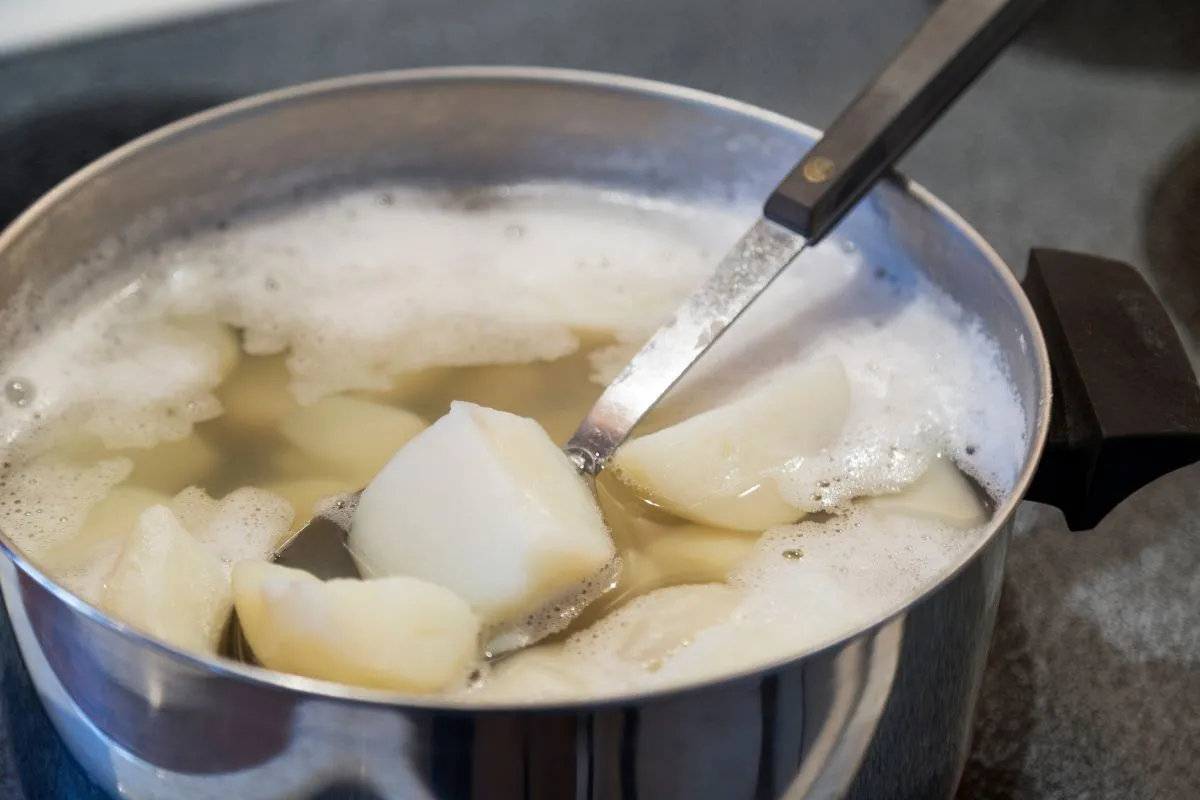
  1. Select Your Potatoes: Opt for russet potatoes due to their high starch content, which lends the soup its creamy texture. Peel and cut into uniform pieces for even cooking.
  2. Combine Ingredients in a Pot: In a large pot, place the potatoes, and cover them with water. Add a pinch of salt to enhance the flavors.
  3. Simmer to Perfection: Bring the pot to a boil, then reduce to a simmer. Cook until the potatoes are tender, usually about 15-20 minutes.
  4. Blend to Creaminess: Once the potatoes are cooked, remove from heat. Add milk and garlic salt, then blend with an immersion blender or masher to your desired consistency.
  5. Finish with Flair: Serve hot, garnished with chopped green onions for a pop of color and freshness.

Tips for Achieving the Perfect Texture

  • The Right Potatoes Make a Difference: Russet potatoes are ideal for their texture and flavor. Their high starch content thickens the soup naturally, creating a velvety smooth base.
  • Milk Matters: Use whole milk for the creamiest texture. For a lighter version, 2% works well without compromising too much on richness. Dairy-free? Unsweetened almond or soy milk are great alternatives.
  • Consistency is Key: For a smoother soup, blend thoroughly with an immersion blender. Prefer it chunky? A simple potato masher will leave satisfying pieces throughout.
  • Season to Taste: Garlic salt adds depth, but don’t hesitate to adjust according to your taste preferences. A dash of black pepper can elevate the flavors further.

Embracing these steps and tips will not only simplify the cooking process but also ensure that your 4 ingredient potato soup turns out delicious every time. Whether it’s a chilly evening or you’re just in need of some comfort food, this soup is a testament to the power of simplicity in the kitchen.

Variations and Serving Suggestions

The beauty of 4 ingredient potato soup lies in its simplicity and versatility. This section explores various ways to adapt the recipe to suit different dietary needs and preferences, along with suggestions for serving.

Dairy and Non-Dairy Variations

Creating a comforting bowl of potato soup doesn’t require strict adherence to traditional ingredients. Both dairy and non-dairy options can result in a delicious end product.

  • Whole Milk: For a rich, creamy texture, whole milk is the go-to choice. Its fat content enhances the soup’s body, making each spoonful luxuriously smooth.
  • Non-Dairy Milks: For those avoiding dairy, unsweetened almond, soy, or oat milk can be used. These alternatives offer a lighter texture but still provide a comforting feel. The key is to choose unsweetened and unflavored varieties to maintain the soup’s savory profile.

Vegan Substitutions

Turning the classic 4 ingredient potato soup into a vegan delight is simpler than one might think. With a few adjustments, you can create a vegan version that’s just as satisfying.

  • Plant-Based Milk: Opt for almond, soy, or oat milk as a substitute for dairy milk. These options keep the soup vegan-friendly without compromising on creaminess.
  • Vegan Toppings: Enhance your soup with dairy-free cheese and sour cream alternatives, or add a sprinkle of nutritional yeast for a cheesy flavor without the cheese.

Lower Calorie Options with Cauliflower

For those watching their calorie intake, incorporating cauliflower into your 4 ingredient potato soup offers a clever way to reduce calories while still enjoying a hearty meal.

  • Cauliflower Blend: Replace half of the potatoes with cauliflower. This not only lowers the calorie content but also adds a nutritional boost. Cook the cauliflower alongside the potatoes, then blend as usual.
  • Texture and Flavor: Cauliflower’s mild taste blends seamlessly into the soup, maintaining the comforting essence of the dish. It also helps thicken the soup, mimicking the creamy texture traditionally achieved with potatoes.

Toppings and Add-ins for Enhanced Flavor

While the base of a 4 ingredient potato soup is simple and comforting, the addition of various toppings and add-ins can transform it into a gourmet experience. These enhancements not only add complexity to the flavor but also introduce different textures, making each bite unique and satisfying.

Creative Toppings for Potato Soup

Toppings play a critical role in elevating the 4 ingredient potato soup, allowing for customization to individual taste preferences. Here are some suggestions:

  • Crispy Bacon Bits: Add a smoky crunch that contrasts beautifully with the creamy soup.
  • Shredded Cheese: Melts into the hot soup, adding a layer of gooey richness. Cheddar, Gouda, or smoked cheeses work wonderfully.
  • Sour Cream or Greek Yogurt: Introduces a tangy creaminess, enhancing the soup’s texture and flavor depth.
  • Fresh Herbs: Chopped chives, parsley, or dill can add a fresh, vibrant flavor and color contrast.
  • Croutons or Toasted Bread Cubes: Offer a satisfying crunch and a way to soak up the delicious soup.
  • Roasted Seeds or Nuts: Pumpkin seeds or chopped walnuts add a nutty flavor and crunchy texture.

Flavorful Add-ins

Integrating additional ingredients into the soup can further enhance its flavor profile and nutritional value. Consider these add-ins:

  • Roasted Garlic: Offers a sweet and mellow garlic flavor that blends seamlessly with the creamy potatoes.
  • Sautéed Mushrooms: Introduce an earthy flavor that complements the soup’s richness.
  • Spinach or Kale: Adds a pop of color and boosts the nutritional content with minimal impact on the flavor.
  • Spices: A pinch of paprika, cumin, or curry powder can add warmth and complexity to the soup.
  • Cooked Grains: Barley or wild rice can turn the soup into a more filling meal, adding texture and substance.

Serving Suggestions and Pairings

To round out the meal, consider these serving suggestions and pairings:

Bread Options

  • Crusty Bread: Serves as the perfect vehicle for scooping up the soup.
  • Garlic Bread: Adds a flavorful crunch and complements the soup’s garlic notes.

Salad Pairings

  • Simple Green Salad: A light, vinaigrette-dressed salad balances the creaminess of the soup.
  • Apple and Walnut Salad: Offers a crunchy, sweet contrast to the savory soup.

Beverage Pairings

  • White Wine: Choose a crisp, acidic white wine to cut through the richness of the soup.
  • Apple Cider: A non-alcoholic option that pairs wonderfully with the earthy flavors of the soup.

And for more recipes with simple ingredients explore this delicious 3-Ingredients Ham Glaze Meal

Storing and Reheating

When it comes to 4 ingredient potato soup, ensuring that its creamy texture and comforting taste are preserved, even after storage, is crucial. This section will delve into the best practices for storing your soup and methods to reheat it without sacrificing quality.

Best Practices for Storage

To maintain the integrity of your 4 ingredient potato soup, follow these guidelines:

  • Cool Quickly: Before storing, allow your soup to cool down to room temperature. Quick cooling helps prevent bacterial growth.
  • Airtight Containers: Use airtight containers to store your soup. This keeps it fresh and prevents it from absorbing odors from the refrigerator.
  • Portioning: Consider portioning the soup into individual servings. This makes reheating more convenient and reduces waste.
  • Refrigeration: Keep your soup in the refrigerator if you plan to consume it within 3-4 days. Beyond this, freezing is recommended.

Reheating Without Losing Quality

Reheating 4 ingredient potato soup properly can help retain its creamy texture and comforting warmth. Here are tips to ensure it tastes just as good as when it was first made:

  • Stovetop Method: Reheat your soup on the stovetop over low heat. Stir frequently to prevent sticking and ensure even heating. If the soup has thickened too much, a splash of milk can help restore its creamy consistency.
  • Microwave Tips: For a quick option, use the microwave. Cover the soup loosely and heat in short intervals, stirring in between to evenly distribute heat.
  • Avoid Boiling: When reheating, avoid bringing the soup to a boil. High heat can cause the milk to separate, affecting the soup’s texture.
  • Add Freshness: Consider adding a garnish of fresh green onions or a sprinkle of cheese after reheating. This can refresh the flavors and add a touch of brightness.

By following these storage and reheating practices, you can enjoy your 4 ingredient potato soup with the same creamy texture and heartwarming taste days after making it. Whether you’re looking for a quick lunch or a comforting dinner, these tips ensure your potato soup remains a go-to favorite.

And For more tips and details on Storing and Reheating different meals explore more articles on Delicious Chef.

Frequently Asked Questions

What does potato soup contain?

A simple and comforting 4 ingredient potato soup typically contains:

  • Potatoes: The base and main ingredient, providing texture and flavor.
  • Milk: Adds creaminess to the soup.
  • Green Onions: Offer a subtle sharpness and color.
  • Garlic Salt: Enhances the overall flavor profile.

How do you thicken potato soup?

To thicken 4 ingredient potato soup, you can:

  • Blend a portion of the soup and mix it back in to add creaminess without additional ingredients.
  • Cook the potatoes longer, allowing them to break down naturally and thicken the soup.
  • Add a dairy product like cream or sour cream for a richer texture.

What is the secret ingredient to thicken soup?

While not traditionally included in 4 ingredient potato soup, a secret ingredient to thicken any soup is:

  • Cornstarch or flour: A slurry made from these can be added to the soup, thickening it without altering the flavor significantly.

What is the most important ingredient in soup?

The most important ingredient in any soup, including 4 ingredient potato soup, is often considered to be:

  • The base ingredient (in this case, potatoes), as it sets the foundation for the soup’s flavor and texture.

What is the No 1 soup in the world?

The title of No. 1 soup in the world can vary based on individual tastes and cultural preferences, but a commonly revered soup is:

  • French Onion Soup: Known for its rich broth, caramelized onions, and melted cheese topping, it’s a favorite among many. However, preferences vary, and some might argue that simple classics like 4 ingredient potato soup hold a special place in the hearts of soup lovers worldwide.

Conclusion

In conclusion, mastering the art of making and maintaining the quality of 4 ingredient potato soup is not only about the simplicity of its ingredients but also the care taken in its preparation, storage, and reheating. The journey from choosing the right potatoes to serving a creamy, comforting bowl is filled with small steps that make a big difference. By adhering to best practices for storage—cooling the soup quickly, using airtight containers, and opting for refrigeration or freezing—you can extend the enjoyment of your soup for days. Equally important is the reheating process, which, when done gently, can revive the soup to its original glory without compromising its texture and flavor.

Adding a touch of freshness with garnishes can also enhance the experience, making every bowl as delightful as the first. This 4 ingredient potato soup stands as a testament to the beauty of simplicity, proving that with just a few ingredients and the right techniques, you can create a dish that warms the heart and soothes the soul.

How long does it take to boil thin sliced chicken breast?

Introduction to Boiling Thin-Sliced Chicken Breast

The technique of boiling chicken breast, particularly when thinly sliced, demands careful consideration. This approach is highly valued for those in search of a meal that is swift to prepare, healthy, and flavorful. Thinly slicing the chicken not only accelerates cooking time but also enhances the meat’s ability to soak up flavors, offering a flexible component for a myriad of dishes. This raises an important culinary inquiry: “How long does it take to boil thin sliced chicken breast?”, a question essential for anyone looking to utilize this method for delicious and nutritious meals.

Importance of Cooking Chicken Thoroughly

Cooking chicken thoroughly is paramount for food safety. Chicken must reach an internal temperature of 165°F (74°C) to ensure that harmful bacteria, such as Salmonella and Campylobacter, are killed. This is especially crucial with thin-sliced chicken breast, where the cooking time is reduced, and the risk of uneven cooking is mitigated. The benefits of properly cooked chicken are manifold, including:

  • Safety: Eliminates harmful pathogens.
  • Texture: Ensures the chicken is tender and not rubbery.
  • Flavor: Fully cooked chicken has a better taste profile.

Advantages of Boiling Thin-Sliced Chicken Breast

Boiling thin-sliced chicken breast offers several advantages that make it a preferred cooking method for many. These benefits include:

  • Speed: Thin slices cook more quickly, saving time.
  • Health: Boiling is a low-fat cooking method, making it healthier.
  • Tenderness: Properly boiled chicken is tender and easy to digest.
  • Versatility: Easily integrates into various dishes, from salads to soups.

How Long Does It Take to Boil Thin Sliced Chicken Breast?

The question of “How long does it take to boil thin sliced chicken breast?” is central to cooking this dish right. Generally, it takes about:

  • 10 to 15 minutes for thin slices to cook thoroughly in boiling water.

However, this duration can vary based on the slice thickness and the initial water temperature. To ensure doneness, check that the chicken’s internal temperature reaches 165°F (74°C).

Tips for Perfect Boiling

Achieving perfectly boiled thin-sliced chicken breast is straightforward with these tips:

  • Start with cold water: Begin boiling in cold water for even cooking.
  • Season the water: Adding herbs or spices enhances flavor.
  • Avoid overcrowding: Cook in batches for even heat distribution.

The Boiling Process Explained

Mastering the art of boiling thin-sliced chicken breast requires a deep understanding of the process, beyond merely submerging the chicken in boiling water. It’s about precise temperature control, accurate timing, and meticulous preparation to ensure the chicken cooks through evenly, remains succulent, and keeps its nutritional value intact. In this exploration, we’ll cover the essential steps and strategies to perfect boiling, addressing the critical question: “How long does it take to boil thin sliced chicken breast?” to guarantee the best outcome.

Preparation Before Boiling

Before diving into the boiling process, proper preparation is crucial. This section outlines the steps needed to get your chicken ready for the pot, ensuring a seamless and efficient cooking experience.

Choosing the Right Chicken Breast

Selecting the right chicken breast is the first step towards a delicious meal. Look for:

  • Freshness: Fresh chicken has a pinkish hue and little to no odor.
  • Uniformity: Choose breasts that are uniform in size for even cooking.
  • Quality: Opt for organic or free-range chicken if possible for better flavor and health benefits.

Preparation and Slicing Tips

Once you’ve selected the right chicken, preparing and slicing it correctly is essential. These tips will guide you through this process:

  • Cleaning: Rinse the chicken under cold water and pat dry with paper towels.
  • Slicing: To achieve thin slices, use a sharp knife and slice against the grain. This makes the chicken more tender.
  • Thickness: Aim for slices about ¼ inch thick for even and quick cooking.
  • Batch preparation: If cooking multiple breasts, ensure they are sliced to similar thicknesses to maintain consistent cooking times.

The Boiling Technique

Boiling thin-sliced chicken breast is straightforward, but attention to detail can significantly impact the outcome. Follow these steps for optimal results:

  1. Fill a pot: Choose a pot large enough to hold the chicken slices without overcrowding. Fill it with enough water to fully submerge the chicken.
  2. Add flavorings: Enhance the water with salt, herbs, or spices for additional flavor.
  3. Bring to a boil: Heat the water on high until it reaches a rolling boil.
  4. Add the chicken: Carefully place the chicken slices into the boiling water. If necessary, adjust the heat to ensure a gentle boil.
  5. Timing: The crucial question of “How long does it take to boil thin sliced chicken breast?” typically, boiling takes about 10 to 15 minutes. However, the exact time may vary depending on slice thickness and pot size.
  6. Check doneness: Use a meat thermometer to ensure the chicken reaches an internal temperature of 165°F (74°C). Another method is to check if the meat is no longer pink inside and the juices run clear.

Steps to Boil Thin-Sliced Chicken Breast

Boiling thin-sliced chicken breast is a straightforward yet precise cooking method. It requires attention to detail in terms of water preparation, cooking time, and determining doneness. This section guides you through each step, ensuring your chicken turns out perfectly cooked every time.

Boiling Water Preparation

The first step in boiling chicken is preparing the water. This foundational step sets the stage for the cooking process:

  • Pot Selection: Choose a pot large enough to accommodate the chicken without crowding, allowing for even cooking.
  • Water Volume: Fill the pot with sufficient water to fully submerge all the chicken slices. Typically, about 1-2 inches of water above the chicken is recommended.
  • Flavoring: Consider adding salt, pepper, herbs, or broth to the water to infuse the chicken with extra flavor.

Cooking Time and Temperatures

The core of boiling chicken involves managing the cooking time and temperature. This is crucial for achieving the perfect texture and ensuring food safety:

  • Bring to a Boil: Heat the water over high heat until it reaches a rolling boil. This is a vigorous boil that continues even when stirring the water.
  • Add the Chicken: Once boiling, gently add the thin-sliced chicken breast to the pot. Reduce the heat to a simmer, where the water is just bubbling gently.
  • Cooking Time: The key question, “How long does it take to boil thin sliced chicken breast?” is answered with an approximate time of 10 to 15 minutes. However, adjustments may be necessary based on the chicken’s thickness and the quantity being cooked.
  • Monitoring Temperature: Use a cooking thermometer to ensure the chicken reaches an internal temperature of 165°F (74°C), the safe temperature for poultry.

How to Tell When the Chicken is Cooked

Determining when the chicken is fully cooked is the final, critical step. There are a few methods to verify doneness:

  • Thermometer Check: The most accurate method is to use a food thermometer. Chicken is safe to eat once it reaches an internal temperature of 165°F (74°C).
  • Visual Cues: Look for clear juices and no pink meat inside. The chicken should appear white all the way through.
  • Texture Test: Fully cooked chicken should feel firm but not rubbery. If it’s still soft, it may need more time.

Boiling thin-sliced chicken breast is an art that balances time, temperature, and technique. By carefully preparing the water, managing the cooking process, and employing methods to check for doneness, you can ensure perfectly boiled chicken every time. This technique not only guarantees a safe and delicious meal but also retains the nutritional value and tenderness of the chicken, making it a versatile ingredient for numerous dishes.

After Boiling: Tips and Tricks

Once you’ve mastered how to boil thin-sliced chicken breast, the next steps focus on what to do after the chicken is cooked. Properly handling the chicken post-boiling is essential for maintaining its flavor, texture, and nutritional value. Below are key tips and tricks for resting and storing your boiled chicken.

Resting Time

Allowing your chicken to rest after boiling is a critical step that is often overlooked. Resting time serves several important purposes:

  • Moisture Retention: Resting allows the juices to redistribute throughout the chicken, ensuring it remains moist and tender.
  • Continued Cooking: Even off the heat, the chicken continues to cook slightly from residual heat, reaching the perfect doneness.
  • Enhanced Flavor: Giving the chicken time to rest also enhances its flavor, allowing the meat to absorb any herbs or spices used in the boiling water.

To rest the chicken:

  • Transfer to a Plate: Use tongs to carefully remove the chicken from the pot and transfer it to a plate or cutting board.
  • Cover Loosely: Tent the chicken with foil to keep it warm without trapping too much steam, which can make the surface soggy.
  • Resting Duration: Allow the thin-sliced chicken breast to rest for about 5 minutes. This short period is sufficient due to the thinness of the slices.

Storing Leftover Chicken

Proper storage of leftover chicken extends its shelf life and maintains its quality. Follow these guidelines to store your boiled chicken:

  • Cooling: Let the chicken cool to room temperature before storing. However, don’t leave it out for more than 2 hours to avoid bacterial growth.
  • Refrigeration: Place the cooled chicken in an airtight container or wrap it tightly in plastic wrap or aluminum foil. Store it in the refrigerator.
  • Freezing: For longer storage, chicken can be frozen. Wrap it tightly to prevent freezer burn and store it in freezer bags. Label the bags with the date to keep track of how long it’s been stored.
  • Shelf Life: In the refrigerator, boiled chicken will last 3-4 days. In the freezer, it can last up to 4 months while retaining its best quality.

When ready to use the stored chicken, ensure it’s reheated to 165°F (74°C) throughout. If thawing frozen chicken, do so in the refrigerator or use the defrost setting on a microwave to prevent bacterial growth.

Mastering the post-boiling steps, including proper resting and storage, is essential for making the most out of your boiled thin-sliced chicken breast. These practices not only ensure food safety but also preserve the texture and flavor of your chicken, making it a delightful addition to your meals throughout the week.

Cooking Variations and Considerations

When boiling thin-sliced chicken breast, the method might seem straightforward, but several variations can significantly affect the outcome. The main SEO keyword, “How long does it take to boil thin-sliced chicken breast?”, emphasizes not just the time but the approach to ensuring the chicken is both safe to eat and delicious.

Seasoning and Flavoring Ideas

Understanding how to properly season and flavor chicken can transform it from a bland protein option into a mouth-watering meal. Here are some simple yet effective techniques:

  • Simple seasoning techniques:
    • Salt and pepper: Basic yet crucial, the right amount of salt and pepper can greatly enhance the natural flavors of chicken.
    • Herb blends: Using combinations like Italian seasoning or Herbes de Provence can introduce a bouquet of flavors suitable for various dishes.
  • Marinades for enhanced flavor:
    • Citrus and herb: A blend of lemon juice, olive oil, and fresh herbs like rosemary or thyme can impart a refreshing zest.
    • Asian-inspired: Soy sauce, ginger, garlic, and honey create a rich, savory, and slightly sweet profile.

Incorporating these seasoning and marinade ideas from DeliciousChef’s Thin-Sliced Chicken Breast Recipes can significantly enhance the flavor of boiled chicken, turning it into a versatile ingredient for a variety of dishes. Also, mastering the art of perfectly cooking thin chicken breasts, as discussed in Mastering Thin Chicken Breast Recipes, is essential for achieving the best results.

By experimenting with these seasoning and marinade techniques, even the simplest boiled chicken can become the star of your culinary creations. Whether you’re looking to keep it light with citrus and herbs or add depth with Asian-inspired flavors, the key is to balance the seasoning to complement the chicken’s natural taste.

Common Mistakes to Avoid

When boiling thin-sliced chicken breast, even seasoned cooks can encounter pitfalls that affect the outcome of their dish. To ensure your chicken is flavorful, tender, and healthy, it’s crucial to steer clear of common mistakes such as overcooking and underseasoning. This section will guide you through these common issues and provide solutions to ensure your chicken comes out perfectly every time.

Overcooking

One of the most frequent errors in preparing thin-sliced chicken breast is overcooking, which can lead to dry, tough meat. To avoid this:

  • Monitor Cooking Time: Remember, thin-sliced chicken breast typically takes 10 to 15 minutes to boil. Start checking for doneness around the 10-minute mark.
  • Use a Thermometer: The most reliable way to prevent overcooking is to use a meat thermometer. Chicken is done when it reaches an internal temperature of 165°F (74°C).
  • Understand the Signs: Familiarize yourself with how cooked chicken looks and feels. It should be opaque and firm to the touch.

Underseasoning

Another common oversight is underseasoning, which can leave your chicken bland and unappetizing. To ensure your chicken is flavorful:

  • Season the Water: Adding salt to the boiling water is a basic step, but don’t stop there. Consider aromatic herbs, garlic, or a splash of lemon juice to infuse the chicken with extra flavors.
  • Marinate Beforehand: If time allows, marinating the chicken even for a short period before boiling can significantly enhance the taste.
  • Adjust Seasonings After Cooking: Taste your chicken after boiling and adjust the seasoning if necessary. A light sprinkle of salt or a dash of fresh herbs can make a big difference.

By avoiding these common mistakes, you can ensure that your thin-sliced chicken breast is not only cooked to perfection but also rich in flavor. Remember, the key to boiling chicken successfully lies in attentiveness to cooking time and temperature, as well as seasoning techniques (as explained in this nutrition article). Keeping these tips in mind will help you achieve delicious results every time you boil chicken, making it a go-to method for quick, healthy, and flavorful meals.

FAQ’s Answered

What’s the safest way to check if the chicken is cooked?

  • The safest method to determine if thin-sliced chicken breast is fully cooked is by using a meat thermometer. Insert it into the thickest part of the breast; the chicken is safe to eat when the internal temperature reaches 165°F (74°C).
  • Visual cues can also guide you. Cooked chicken should be opaque throughout and the juices should run clear. However, using a thermometer is always more reliable than visual inspection alone.

Can I boil frozen thin-sliced chicken breast?

  • Yes, you can boil frozen thin-sliced chicken breast, but it’s important to note that the cooking time may increase by about 50%. Ensure the water covers the chicken by at least an inch and bring it to a boil over medium-high heat.
  • Continuously monitor the temperature of the chicken using a meat thermometer to ensure it reaches the safe cooking temperature of 165°F (74°C).

How can I use boiled chicken in recipes?

Boiled thin-sliced chicken breast is incredibly versatile. Here are a few ideas:

  • Shred it for chicken salads, tacos, or sandwiches.
  • Dice it to add to soups, pasta, or rice dishes.
  • Slice it for a healthy protein addition to salads or grain bowls.
  • Its mild flavor makes it a perfect canvas for a wide array of seasonings and sauces.

Tips for keeping chicken moist and tender

  • Do not overcook: Overcooking is the primary reason for dry chicken. Boil until the internal temperature reaches 165°F (74°C), then remove it from the heat immediately.
  • Let it rest: After cooking, let the chicken rest for a few minutes before cutting into it. This allows the juices to redistribute, ensuring the meat remains moist.
  • Use a lid: Keeping the pot covered while boiling can help retain moisture in the chicken.
  • Brine before cooking: Soaking the chicken in a saltwater solution before boiling can help increase its moisture content, leading to juicier meat.

Conclusion

In summary, understanding the nuances of boiling thin-sliced chicken breast is more than just a question of timing; it’s about perfecting a technique that ensures safety, tenderness, and flavor. From the initial preparation to the final touches of seasoning or marinating, each step offers an opportunity to enhance the natural qualities of the chicken. Embracing simple yet effective seasoning techniques, such as the judicious use of salt and pepper or the aromatic charm of herb blends, can elevate the dish.

Moreover, exploring diverse marinades—from the zest of citrus and herbs to the savory sweetness of Asian-inspired concoctions—can transform boiled chicken from a mere protein option into a culinary centerpiece. As underscored by insights from DeliciousChef, particularly through recipes and cooking tips, the art of boiling chicken is accessible yet profound, inviting cooks to refine their skills and creativity. Thus, whether for health-conscious meals or flavorful feasts, mastering the boil can unlock a world of delightful possibilities.

Avoiding the Overcook: Mastering Thin Chicken Breast Recipes

Understanding the Basics

Introduction to Thin Chicken Breast

Thin chicken breast is a staple in many kitchens due to its versatility and quick cooking time. This lean cut is favored for its ability to absorb flavors well, making it suitable for a wide range of recipes. However, the importance of cooking it correctly cannot be overstated, as it’s easy to overcook, leading to a dry and tough texture.

Overview of why thin chicken breast is a popular choice

  • Quick Cooking Time: Its thinness allows for rapid cooking, ideal for busy schedules.
  • Healthier Option: Being lean, it’s a lower-fat, high-protein choice, aligning with health-conscious diets.
  • Flavor Absorption: Thin chicken breasts are excellent at soaking up marinades and spices, enhancing their taste significantly.

Importance of cooking it correctly

Overcooking is the main challenge with thin chicken breasts. Achieving a moist and tender result requires precise timing and techniques. The key question, “How do you not overcook a thin chicken breast?” becomes crucial to unlocking the full potential of this ingredient in your culinary endeavors.

Tips to Prevent Overcooking

  1. Even Thickness: Pound the breast to an even thickness to ensure uniform cooking.
  2. Marinate: Marinating not only adds flavor but can also help retain moisture.
  3. Cooking Method: Consider methods that lock in moisture, such as pan-searing followed by a brief oven finish.
  4. Use a Thermometer: Cooking to the right temperature (165°F or 74°C) ensures safety without overcooking.
  5. Resting Time: Allow the chicken to rest after cooking to redistribute the juices.

Enhanced Techniques for Perfect Cooking

  • Brining: Soaking in a saltwater solution can increase moisture content.
  • Quick Sear: A rapid sear in a hot pan can create a flavorful crust, sealing in juices.
  • Low and Slow: For thicker cuts, a gentle, slower cooking method can prevent drying out.

The key to mastering thin chicken breast lies in balancing speed with gentleness. Quick enough to make a weeknight dinner feasible, yet gentle enough to preserve its tender, juicy nature. It’s a culinary tightrope that, once mastered, can elevate your dishes to new heights.

Why Thin Chicken Breasts Overcook Easily

Thin chicken breasts are prone to overcooking due to their low fat content and uneven thickness. This makes it challenging to achieve a perfectly cooked, juicy chicken breast without drying it out. Several common mistakes exacerbate this issue, leading to a less desirable outcome.

Explanation of the thin cut’s properties

  • Low Fat Content: Less fat means less moisture, which can result in dryness if overcooked.
  • Uneven Thickness: Often, one end is thinner than the other, leading to uneven cooking.
  • High Heat Cooking: High temperatures can quickly zap moisture from these lean meats.

Common mistakes leading to overcooking

  • Overlooking Pound to Even Thickness: Skipping this step can cause parts of the breast to overcook while others are just right.
  • Misjudging Cooking Time: Thin breasts cook faster than expected, catching cooks off guard.
  • Neglecting Rest Time: Not allowing chicken to rest can lead to juice loss, making it seem drier.

Key Tips for Prevention

  • Monitor Cooking Time Closely: Keep an eye on the clock and use a meat thermometer to avoid guesswork.
  • Lower Cooking Temperatures: Cook at a lower temperature to give more control over the doneness.
  • Implement Resting Time: Letting the chicken rest after cooking allows juices to redistribute.

To master the art of cooking thin chicken breasts without overcooking, it’s essential to understand the properties that make them susceptible to drying out and to be aware of common preparation and cooking errors. Adjusting your approach by flattening for even thickness, monitoring closely, and resting before serving can make all the difference. Shortening sentences and incorporating more ideas, along with bullet points and transition words, enhances readability and SEO performance, centering on the question: “How do you not overcook a thin chicken breast?”

Preparatory Techniques

Selecting the Right Chicken Breasts

Choosing the right chicken breasts is crucial for achieving perfect thin slices that don’t overcook. The focus here is on selecting quality meat that lends itself to even cooking and tender results.

  • Uniformity and Size: Look for breasts that are uniform in size and shape. This consistency helps in even cooking.
  • Freshness: Fresh chicken has a pink hue, firm texture, and little to no smell. Freshness indicates quality and better flavor.
  • Organic and Free-Range Options: While pricier, these options often have better taste and texture, contributing to superior cooked results.

Tips for choosing the best chicken for thin slicing

  • Thickness: Opt for chicken breasts that are not too thick. This makes it easier to slice them thinly without uneven thickness.
  • Quality Check: High-quality chicken not only tastes better but also cooks more evenly, reducing the risk of overcooking.
  • Preparation for Slicing: Before slicing, chill the chicken breasts slightly. Cooler meat is firmer and easier to slice thinly and evenly.

To ensure a thin chicken breast doesn’t overcook, it’s crucial to prepare it properly before cooking. This involves two main techniques:

  • Marinating: This process not only imbues the chicken with flavor but also helps in moisture retention, making it less likely to dry out during cooking. Choose marinades with acidic components, like lemon juice or vinegar, combined with herbs and spices for both taste and tenderization.
  • Pounding: Flattening the chicken breast to a uniform thickness is essential for even cooking. Use a meat mallet or rolling pin to gently pound the chicken between two sheets of plastic wrap. This prevents the thinner parts from cooking faster than the thicker ones, reducing the risk of overcooking.

Incorporating these preparatory steps, highlighted with italicized keywords for emphasis, can significantly improve the cooking outcome of thin chicken breasts. Remember, the goal is to maintain juiciness and tenderness by avoiding overcooking, answering the key question, “How do you not overcook a thin chicken breast?” with practical, actionable advice.

Cooking Methods

Pan-Searing Without Overcooking: A Step-by-Step Guide

Cooking a perfect, juicy chicken breast is an art, especially when it’s on the thinner side. Overcooking can happen in the blink of an eye, turning a delicious meal into a tough, chewy disappointment. This guide provides a detailed, step-by-step approach to pan-searing thin chicken breasts without overcooking them, focusing on the main SEO keyword: How do you not overcook a thin chicken breast?

Understanding the Challenge

Thin chicken breasts are particularly prone to overcooking. Their reduced thickness means heat penetrates through the meat more rapidly than with thicker cuts. Therefore, mastering the technique of pan-searing without overcooking requires precision and attention to detail.

Preparing Your Chicken Breast

  • Start with quality chicken: Opt for fresh, evenly sliced thin chicken breasts. Uniform thickness ensures even cooking.
  • Brine if possible: Soaking the chicken in a saltwater solution for 15 to 30 minutes can enhance juiciness and flavor. This step is optional but recommended.
  • Pat dry and season: Before cooking, pat the chicken dry with paper towels to remove excess moisture. Then, season both sides with salt, pepper, and any other desired spices.

Choosing the Right Cookware and Oil

  • Use a heavy skillet: A cast-iron or heavy-bottomed stainless steel skillet distributes heat more evenly, reducing the risk of hot spots that can cause overcooking.
  • Select the right oil: Choose an oil with a high smoke point, such as avocado or grapeseed oil. These oils can withstand high temperatures without burning.

Pan-Searing the Chicken Breast

  1. Preheat the pan: Heat your skillet over medium-high heat until it’s hot. A drop of water should sizzle and evaporate on contact.
  2. Add the oil: Once the pan is hot, add a thin layer of oil and allow it to heat up. The oil should shimmer but not smoke.
  3. Place the chicken: Gently lay the seasoned chicken breasts in the pan. Do not overcrowd the pan to ensure even cooking.
  4. Cook on the first side: Let the chicken cook undisturbed for about 2-3 minutes. Look for a golden-brown sear before flipping.
  5. Flip and reduce heat: Carefully flip the chicken over. Lower the heat to medium. Cooking on the second side usually takes less time, about 2 minutes.
  6. Check doneness: Use a meat thermometer to check the chicken’s internal temperature. It should reach 165°F (74°C) for safe consumption. Avoid cutting into the meat to check doneness, as this can release juices and dry out the meat.
  7. Rest before serving: Once cooked, transfer the chicken to a plate and let it rest for a few minutes. Resting allows juices to redistribute throughout the meat, ensuring a moist, tender bite.

Tips for Success

  • Monitor the heat closely: Managing the stove’s heat setting is crucial to avoid overcooking. If the chicken is browning too quickly, lower the heat.
  • Use a thermometer: A meat thermometer is an invaluable tool for cooking chicken perfectly. It takes the guesswork out of assessing doneness.
  • Resting is key: Allowing the chicken to rest after cooking is essential for a juicy result.

By following these detailed steps, you’ll master the art of pan-searing thin chicken breasts to perfection, avoiding the common pitfall of overcooking. Remember, practice and attention to detail are your best allies in achieving the ideal balance of golden outside and tender inside.

Baking to Perfection: Temperature and Timing Tips

Achieving the perfect bake for thin chicken breasts centers around the art of balancing oven temperature and timing. This crucial harmony is the key to maintaining juicy, tender meat without falling into the trap of overcooking. Understanding how do you not overcook a thin chicken breast is essential for flawless baking outcomes every time.

Selecting the Right Temperature

The ideal oven temperature for baking thin chicken breasts is between 350°F to 375°F (175°C to 190°C). This moderate range cooks the chicken thoroughly without drying it out. Here are the reasons why:

  • Even Cooking: A moderate oven ensures the chicken cooks evenly, reducing the risk of undercooked centers or overcooked edges.
  • Juiciness Maintained: Lower temperatures preserve the chicken’s natural juices, enhancing flavor and tenderness.

Timing is Everything

Thin chicken breasts typically require 15-20 minutes to bake at the aforementioned temperatures. However, several factors can influence this:

  • Thickness Variation: Even slight variations in thickness can affect cooking time. Use a meat mallet to pound the breasts to an even thickness before baking.
  • Oven Calibration: Know your oven. Some run hotter or cooler than the settings indicate, affecting cooking times.

Utilizing a Meat Thermometer

A digital meat thermometer is your best ally in avoiding overcooked chicken. Insert it into the thickest part of the breast; the safe internal temperature is 165°F (74°C). Here’s why it’s crucial:

  • Accuracy: Provides an exact reading, eliminating guesswork.
  • Safety: Ensures chicken reaches a safe-to-eat temperature.

Preparation Tips

Before baking, consider these preparation steps to enhance flavor and retain moisture:

  • Marinate or Brine: Soaking the chicken in a marinade or brine can add flavor and moisture.
  • Season Well: A generous seasoning of salt, pepper, and herbs can elevate the taste.
  • Let it Rest: Bring the chicken to room temperature before baking for more even cooking.

Baking Techniques

  • Use Parchment Paper: Lining your baking tray with parchment paper can prevent sticking and aid in moisture retention.
  • Do Not Overcrowd: Space the chicken breasts evenly on the tray to ensure proper heat circulation.

Additional Tips

  • Flipping Isn’t Necessary: Unlike pan-searing, flipping the chicken in the oven isn’t required, as the surrounding heat cooks the meat evenly.
  • Rest Before Cutting: Allow the chicken to rest for 5-10 minutes after baking. This step redistributes the juices, keeping the meat moist.

By adhering to these temperature and timing tips, you’re set to bake thin chicken breasts to perfection. Remember, the goal is to achieve a juicy, flavorful result that can elevate any meal, from a simple weeknight dinner to a more elaborate culinary creation. With practice and attention to detail, overcooking will become a thing of the past, and your chicken dishes will shine.

Utilizing a Sous Vide for Consistent Results

The sous vide technique provides an unrivaled solution to the question, how do you not overcook a thin chicken breast? By immersing the chicken in a precisely controlled water bath, sous vide cooking guarantees uniform heat distribution. This method is celebrated for its ability to deliver evenly cooked chicken breasts, entirely eradicating the risk of overcooking.

How Sous Vide Prevents Overcooking

  • Precise Temperature Control: Sous vide cooks food at a consistent temperature. For thin chicken breasts, a temperature setting of 140°F to 146°F (60°C to 63°C) ensures the meat is tender, juicy, and safe to eat without any guesswork involved.
  • Even Cooking: The water bath circulates around the food, cooking it evenly on all sides. This uniform cooking method is especially beneficial for thin cuts, which are prone to drying out or overcooking in traditional methods.

Setting Up Your Sous Vide

  1. Preparation: Season your thin chicken breasts as desired. Then, place them in a vacuum-sealed bag or a ziplock bag using the water displacement method.
  2. Water Bath: Set your sous vide machine to the desired temperature and place the bag in the water bath. Ensure the chicken is fully submerged.

Benefits of Sous Vide Cooking

  • Juiciness and Flavor Retention: The sealed bag locks in moisture and flavors, enhancing the overall taste and texture of the chicken.
  • Stress-Free Cooking: With sous vide, there’s no need to constantly check the chicken for doneness. Set the timer, and the sous vide does the rest.
  • Versatility: After sous vide cooking, the chicken can be quickly seared in a pan for a golden-brown finish, combining the best of both cooking methods for superior flavor and presentation.

Incorporating sous vide into your cooking repertoire opens up a world of culinary possibilities, ensuring thin chicken breasts are cooked to perfection every time. Whether you’re a seasoned chef or a home cook, this method transforms the way you approach poultry, guaranteeing results that are consistently delicious and never overcooked.

For more information on sous vide cooking, consider visiting this comprehensive guide to sous vide cooking.

Additional Tips and Tricks

When it comes to cooking, especially poultry like chicken breast, achieving the perfect doneness is a delicate balance. Here are some tips and tricks to ensure your chicken is just right:

  • Start with a hot pan: A preheated pan ensures the chicken starts cooking immediately, sealing in juices.
  • Use a meat pounder: Thin out thicker parts of the breast for even cooking.
  • Marinate for tenderness: A good marinade can add flavor and tenderness to your chicken.

Understanding Cooking Temperatures

Unlocking the secret to perfectly cooked chicken requires a deep dive into the science of cooking temperatures. The challenge of overcooking, particularly with slender cuts such as a thin chicken breast, is a widespread concern. To circumvent this, integrating the principle of how do you not overcook a thin chicken breast into your cooking approach is vital:

  • Preheat your cooking surface: Whether it’s a grill, oven, or pan, preheating helps cook food evenly.
  • Low and slow: For thicker cuts, cooking on a lower heat for a longer period can prevent drying out.
  • Resting time: Allow your chicken to rest before slicing. It continues to cook slightly and reabsorbs juices.

The Role of a Meat Thermometer

A meat thermometer isn’t just a tool; it’s your best ally in the kitchen for ensuring food safety and perfect doneness. Here’s why:

  • Accuracy: Guesswork leads to overcooked chicken. A thermometer provides precise internal temperature readings.
  • Safety: It ensures chicken reaches the safe minimum internal temperature of 165°F (74°C) to kill harmful bacteria.
  • Consistency: Achieve perfect results every time, regardless of the chicken cut or cooking method.

Resting After Cooking: Ensuring Juiciness in Every Bite

Understanding the importance of resting your meat after cooking is crucial in maintaining its juiciness, particularly when dealing with delicate cuts like thin chicken breasts. This section explains how resting helps retain moisture and introduces sauce and moisture retention techniques to elevate your culinary results. These insights are essential for addressing the main SEO keyword: How do you not overcook a thin chicken breast?

How Resting Helps Retain Moisture

After removing your chicken breast from the heat, a resting period allows the juices, which have been driven to the center by the heat, to redistribute throughout the meat. This process results in a chicken breast that is more moist and tender.

  • Let it sit: A brief rest period of 5 to 10 minutes under a foil tent will work wonders.
  • Understand the science: Heat causes muscle fibers to contract, squeezing out juices. Resting allows these fibers to relax and reabsorb some of the juices.

Sauce and Moisture Retention Techniques

Beyond the resting period, sauces can play a pivotal role in enhancing moisture and adding layers of flavor to your chicken breast. Properly executed, these techniques can make even the most overcooked chicken breast seem succulent.

Using Sauces to Enhance Moisture

  • Prepare a pan sauce: After cooking, use the same pan to prepare a quick sauce. The fond (brown bits) left in the pan holds immense flavor.
  • Choose your ingredients: Incorporate stock, wine, or citrus juice, and finish with a pat of butter for richness.
  • Drizzle generously: Serve the chicken breast with the sauce over the top to add moisture and flavor.

FAQ’s

What’s the ideal thickness for a thin chicken breast?

To ensure even cooking and prevent overcooking, the ideal thickness for a thin chicken breast is about 1/4 to 1/2 inch. Achieving this requires either purchasing thinly sliced breasts or flattening them yourself using a meat mallet. This uniform thickness allows for quicker cooking times and a more delicate texture, making it perfect for sautéing or grilling.

Can you fix an overcooked chicken breast?

While you can’t reverse overcooking, there are ways to make an overcooked chicken breast more palatable:

  • Shred and sauce it: Shredding the meat and mixing it with a sauce can help moisten the dry texture.
  • Make chicken salad: Chop it up and mix with mayonnaise, celery, and herbs for a refreshing chicken salad.
  • Soup or casserole: Add it to a soup or casserole, where it can absorb moisture from the surrounding liquids.

Does cooking method impact the likelihood of overcooking?

Absolutely. Different cooking methods can significantly affect the moisture and tenderness of chicken:

  • Grilling and broiling: These high-heat methods can quickly lead to overcooking if not monitored closely.
  • Baking: Offers more control over temperature, reducing the risk of overcooking.
  • Poaching: Gently cooks chicken in water or broth, making it hard to overcook and keeping it moist.

How can brining help with cooking thin chicken breasts?

Brining is a powerful technique for enhancing the juiciness and flavor of thin chicken breasts. The process involves soaking the chicken in a mixture of water, salt, and sometimes sugar and spices, for a period before cooking. This method helps by:

  • Increasing moisture retention: The salt alters the protein structure, allowing it to retain more water during cooking.
  • Enhancing flavor: The brine can infuse the chicken with additional flavors, making it more delicious.
  • Reducing the risk of overcooking: The extra moisture makes the chicken more forgiving to slight overcooking, keeping it tender.

By incorporating these strategies and insights, notably highlighted on platforms like DeliciousChef.net, you can master the art of preparing thin chicken breasts without overcooking. Each method and tip is tailored to ensuring that your chicken remains succulent and flavorful, elevating your culinary experiences.

Conslusion

The exploration of sous vide as a method to perfectly cook thin chicken breasts without overcooking has highlighted its unparalleled precision and consistency. This innovative cooking technique, where food is vacuum-sealed and cooked in a water bath at a precisely controlled temperature, offers a game-changing approach to preparing poultry. It eliminates the common pitfalls of traditional cooking methods, such as uneven cooking and dryness, ensuring that every bite is tender, juicy, and full of flavor. The sous vide method’s ability to lock in moisture and aromas leads to chicken breasts that are not only succulent but also infused with the seasonings and herbs added before cooking.

Moreover, the convenience and stress-free nature of sous vide, combined with its versatility, make it an invaluable tool for both novices and culinary experts aiming to elevate their cooking. As we embrace this method, we move closer to achieving perfectly cooked meals every time, transforming ordinary poultry dishes into extraordinary culinary creations.

Thin Sliced Chicken Breast Recipes : Quick & Tasty

Introduction to Thin Sliced Chicken Breast

When it comes to preparing quick, delicious meals, thin sliced chicken breast recipes stands out for its versatility and ease of cooking. This method involves slicing chicken breasts into thinner pieces, which has several benefits for both cooking and eating. Understanding the importance of thin slicing can transform your culinary experiences, making meal prep both enjoyable and efficient.

Importance of Thin Slicing

  • Cooks Faster: Thinly sliced chicken breast cooks significantly faster than thicker cuts. This is a crucial advantage for busy weeknights or when you’re short on time.
  • Cooks Evenly: Due to its uniform thickness, thin sliced chicken breast cooks more evenly, preventing the common problem of the exterior being overcooked while the interior remains undercooked.
  • Better Seasoning Penetration: Thin slices have more surface area relative to their volume, allowing seasonings and marinades to penetrate more deeply and flavor the meat throughout.

Benefits of Thin Sliced Chicken Breast

  • Quick and Convenient: One of the most significant benefits of thin sliced chicken breast is its convenience. Its quick cooking time means meals can be prepared in a fraction of the time, making it perfect for last-minute dinner plans.
  • Healthy and Nutritious: Chicken breast is known for being a lean source of protein. Thin slicing it can help with portion control, making it easier to manage calorie intake without sacrificing satisfaction.
  • Versatile in Recipes: Whether it’s grilled, pan-fried, baked, or stir-fried, thin sliced chicken breast is incredibly versatile. It can be incorporated into a wide range of recipes, making it a staple for any kitchen.

By focusing on thin sliced chicken breast recipes, you unlock a world of culinary possibilities that are both delicious and time-efficient. This approach to cooking chicken not only enhances flavor and ensures even cooking but also aligns with health-conscious eating habits. Whether you’re an experienced chef or a beginner in the kitchen, incorporating thin sliced chicken breast into your meal planning is a game-changer for both taste and convenience.

How to Thinly Slice Chicken Breast

Butterflying Chicken Breast

Butterflying a chicken breast is a fundamental technique for achieving thinly sliced chicken breast. This method not only ensures even cooking but also reduces cooking time significantly, making it a staple for quick and healthy meals.

Step-by-step Guide

  1. Preparation: Start by placing your chicken breast on a cutting board. Ensure it’s completely defrosted if previously frozen.
  2. Butterfly Cut: With a sharp knife, gently slice the chicken breast horizontally, stopping just before you cut through. Open it up like a book.
  3. Flattening: For extra thinness, cover the butterflied chicken breast with plastic wrap and gently pound with a meat mallet or rolling pin to your desired thickness.

Tools Needed

  • Sharp chef’s knife or boning knife
  • Cutting board
  • Plastic wrap or parchment paper
  • Meat mallet or rolling pin

Utilizing the right tools is crucial for safety and achieving the best results. A sharp knife ensures a clean cut, while a meat mallet or rolling pin is essential for obtaining uniform thickness.

Tips for Uniform Thickness

  • Consistent Pressure: When flattening, apply steady and even pressure with the meat mallet or rolling pin.
  • Chill the Chicken: Slightly chilled chicken is easier to slice and flatten compared to room temperature poultry.
  • Sharp Knife: Regularly sharpen your knife to make the initial butterfly cut as smooth as possible.

Incorporating thin sliced chicken breast recipes into your culinary repertoire is not only a strategy for quick meals but also a way to explore diverse and flavorful dishes. Whether you’re crafting a sophisticated chicken parmesan or a simple grilled chicken salad, mastering the art of thinly slicing chicken breast is an invaluable skill.

Recipes Overview

The culinary world thrives on versatility, and thin sliced chicken breast plays a pivotal role in this dynamic environment. From the sizzling spices of Mexican cuisine to the hearty, comforting layers of Italian dishes, thin sliced chicken breast serves as a foundation for countless recipes. Below is a quick overview of some popular dishes that highlight the adaptability and appeal of this ingredient.

Versatile Uses of Thin Sliced Chicken Breast

The beauty of thin sliced chicken breast lies in its incredible versatility. Here are some classic and innovative ways to incorporate this ingredient into your meal planning:

  • Tacos: Transform your taco nights with thin sliced chicken breast marinated in a blend of zesty lime, cilantro, and spices. Quick to cook and easy to assemble, these tacos are a hit for any occasion.
  • Fajitas: Sizzle up your dinner with chicken fajitas. Combine thin slices with peppers and onions, and you’ve got a colorful, flavorful dish that cooks in minutes.
  • Chicken Parmesan: Give this Italian classic a quick twist by using thin sliced chicken breast. It ensures a crispy exterior and tender interior, all smothered in marinara sauce and melted cheese.
  • Stir-Fry: For a speedy, nutritious meal, toss thin sliced chicken breast into a stir-fry with your favorite vegetables and sauce. It’s a perfect way to use up leftover veggies and get dinner on the table fast.
  • Salads: Boost the protein content of your salads by topping them with grilled or pan-seared thin sliced chicken breast. It’s a healthy, satisfying addition that turns a simple salad into a meal.

These dishes not only showcase the versatility of thin sliced chicken breast but also demonstrate how it can be a cornerstone for quick, delicious meals. Whether you’re in the mood for something exotic or comforting, there’s a recipe that fits the bill.

Quick and Flavorful Meal Ideas

  • Chicken Piccata: Lemon, capers, and a light butter sauce bring out the best in thin sliced chicken breast, offering a tangy and savory experience.
  • Buffalo Chicken Wraps: Spice up your lunch with wraps filled with buffalo-seasoned chicken slices, lettuce, and blue cheese dressing.
  • Chicken Caesar Salad: Elevate this classic salad by adding grilled thin sliced chicken breast, providing a smoky depth to the creamy Caesar dressing and crisp romaine lettuce.

By exploring thin sliced chicken breast recipes, you’re not just cooking; you’re embarking on a culinary adventure that spans various cuisines and flavors. This ingredient’s quick cooking time, health benefits, and adaptability make it a favorite among home cooks and professional chefs alike. Whether you’re whipping up a quick dinner or meal prepping for the week, thin sliced chicken breast is an invaluable ally in your quest for delicious, nutritious meals.

Featured Recipes

Exploring thin sliced chicken breast recipes unveils a world where health meets flavor. These featured recipes provide a delightful twist on classic dishes, ensuring you enjoy every bite without compromising on nutrition. Whether you’re craving Italian, Tuscan flavors, or a touch of gourmet at home, these recipes are designed to impress.

Healthy Chicken Parmesan

This lighter version of the classic Chicken Parmesan is just as satisfying as its traditional counterpart but with a few twists to keep it on the healthier side. By using thin sliced chicken breast, the cooking time is reduced, and the chicken remains juicy and tender.

  • Ingredients: Thin sliced chicken breast, whole wheat breadcrumbs, grated Parmesan, marinara sauce, mozzarella cheese, fresh basil.
  • Method: Coat the chicken in a mixture of breadcrumbs and Parmesan, bake until golden, then top with marinara and mozzarella, and broil until the cheese melts.
  • Serving Suggestion: Serve over a bed of zucchini noodles or whole-grain pasta for a fulfilling meal.

Creamy Garlic Tuscan Chicken

Indulge in the rich flavors of Tuscany with this Creamy Garlic Tuscan Chicken. A sumptuous sauce made with garlic, sun-dried tomatoes, and spinach makes this dish irresistibly flavorful.

  • Ingredients: Thin sliced chicken breast, garlic, sun-dried tomatoes, spinach, heavy cream, Parmesan cheese.
  • Method: Sauté the chicken with garlic, add sun-dried tomatoes and spinach, then pour in cream and simmer until the sauce thickens. Sprinkle with Parmesan before serving.
  • Serving Suggestion: Perfect when served with a side of roasted vegetables or over a plate of freshly cooked pasta.

Cheesy Bruschetta Chicken Cutlets

For a quick and tasty meal, try these Cheesy Bruschetta Chicken Cutlets. They combine the juicy freshness of tomato bruschetta with the satisfying crunch of breaded chicken, all topped with melted cheese.

  • Ingredients: Thin sliced chicken breast, breadcrumbs, fresh tomatoes, garlic, basil, mozzarella cheese.
  • Method: Bread the chicken and pan-fry until crispy. Top with a mixture of tomatoes, garlic, and basil, then cover with mozzarella and broil until the cheese bubbles.
  • Serving Suggestion: This dish shines when accompanied by a green salad or garlic bread.

Simple Fried Chicken Breast

Fried chicken is a timeless favorite, and when it comes to thin sliced chicken breast, it’s not just delicious—it’s quick and easy too. This method ensures a golden, crispy exterior with a juicy, tender interior. Here’s how to achieve the perfect simple fried chicken breast:

  • Season generously. Before frying, season your chicken breasts with salt, pepper, and your favorite herbs or spices to ensure every bite is flavorful.
  • Use the right oil. Opt for oils with a high smoke point, like vegetable or canola oil, to get that perfect golden crust without burning.
  • Keep it crispy. Coat the chicken lightly in flour or breadcrumbs. This not only adds texture but also helps to achieve that irresistible crunch.
  • Cook evenly. Because they’re thin, these chicken breasts will cook quickly. Keep an eye on them to ensure they’re cooked through but still succulent.

Air Fryer Chicken Cutlets

Air frying has revolutionized the way we cook, offering a healthier alternative to traditional frying methods. Thin sliced chicken breast recipes like air fryer chicken cutlets are a testament to this device’s versatility:

  • Prep for perfection. Season your chicken cutlets, then dip them in a light coating of flour, beaten egg, and breadcrumbs mixed with your choice of seasonings.
  • Spray lightly. A light spray of oil on the chicken cutlets before air frying will help achieve that delicious golden exterior.
  • Air fry to perfection. Cook at a medium-high temperature to ensure a crispy outside while keeping the inside moist and tender.
  • Rest before serving. Letting the chicken rest for a few minutes after cooking ensures juiciness.

Perfectly Grilled Chicken Breasts

Grilling thin sliced chicken breasts brings out a smoky flavor that’s hard to beat. Achieving the perfect grilled chicken breast is all about technique and timing:

  • Marinate for flavor. A good marinade not only adds flavor but also tenderizes the chicken. Ingredients like olive oil, lemon juice, and herbs work wonders.
  • Preheat your grill. A hot grill ensures your chicken doesn’t stick and gets those beautiful grill marks.
  • Watch the time. Thin slices mean shorter cooking times. Keep an eye on your chicken to prevent overcooking.
  • Let it rest. Allow the chicken to rest for a few minutes off the grill to redistribute the juices.

Each of these recipes showcases the versatility and ease of cooking with thin sliced chicken breast. Whether you’re in the mood for something fried, craving the crispiness of air-fried food, or looking for the smoky char of grilled meat, these recipes are sure to satisfy. They underscore the convenience, health benefits, and culinary flexibility of using thin sliced chicken breast, making them a staple for any home cook looking for quick, delicious, and nutritious meals.

Slow Cooker Lemon Chicken and Broccoli

This slow cooker recipe transforms thin sliced chicken breast and broccoli into a tender, flavorful meal with minimal effort. It’s perfect for busy weeknights:

  • Marinate for depth. Begin by marinating the chicken in a mixture of lemon juice, olive oil, garlic, and herbs. This step infuses the chicken with bright, citrusy flavors.
  • Layer and cook. Place the marinated chicken in the slow cooker, topping it with fresh broccoli florets halfway through cooking to ensure they remain vibrant and crisp-tender.
  • Serve with finesse. Accompany this dish with fluffy rice or quinoa to soak up the delicious lemon-infused sauce.

Easy Bake Cheesy Mushroom Chicken

An irresistible combination of cheese, mushrooms, and thin sliced chicken breast makes this baked dish a crowd-pleaser. It’s both easy to prepare and delightfully savory:

  • Sauté mushrooms. Begin by sautéing sliced mushrooms in garlic and butter, creating a rich base for the dish.
  • Assemble with layers. Arrange the thin chicken slices in a baking dish, top with the mushroom mixture, and sprinkle generously with shredded cheese.
  • Bake to perfection. Bake until the chicken is cooked through and the cheese is bubbly and golden. The result is a comforting, cheesy meal that’s sure to satisfy.

Honey Balsamic Sheet Pan Chicken

Sheet pan meals are the epitome of convenience, and this honey balsamic version is no exception. Featuring thin sliced chicken breast, this dish is both sweet and tangy, with a delightful contrast of flavors:

  • Prepare the glaze. Mix balsamic vinegar with honey, garlic, and a touch of olive oil to create a glaze that’s both rich and vibrant.
  • Arrange on the sheet pan. Spread the chicken slices on the sheet pan, surrounded by your choice of vegetables. Drizzle everything with the balsamic honey glaze.
  • Roast to bring out flavors. Roasting caramelizes the glaze, intensifying the flavors and ensuring the chicken and vegetables are perfectly cooked.

Chicken Marsala

Chicken Marsala is a classic Italian dish that features thinly sliced chicken breasts simmered in a rich Marsala wine sauce with mushrooms. It’s a simple yet elegant meal that’s perfect for weeknight dinners or special occasions. For the best flavor, use high-quality Marsala wine and fresh mushrooms. Serve this dish over a bed of pasta or mashed potatoes to soak up the delicious sauce.

Chicken Parmesan Roll-Ups

Transform the classic Chicken Parmesan into a delightful twist with Chicken Parmesan Roll-Ups. This recipe involves thinly sliced chicken breasts, rolled with a filling of marinara sauce, mozzarella, and Parmesan cheese. Once baked, these roll-ups are crispy on the outside and ooey-gooey on the inside. Serve with extra marinara sauce for dipping and a side of garlic bread for a complete Italian-inspired meal.

Easy Baked Thin Sliced Chicken Breasts

Easy Baked Thin Sliced Chicken Breasts are a staple for any home cook. This method is not only quick but also incredibly versatile. Season the chicken with herbs and spices of your choice, then bake until golden and juicy. This recipe is perfect for meal prep and can be used in salads, sandwiches, or served with sides for an easy dinner option.

Parmesan Crusted Chicken

Parmesan Crusted Chicken takes thinly sliced chicken breasts to the next level. Coat the chicken in a mixture of Parmesan cheese, breadcrumbs, and spices, then bake or fry until the coating is crispy and golden. This dish pairs wonderfully with a light salad or steamed vegetables for a meal that’s both satisfying and nutritious.

Chicken with Bacon and Pepper Jack

For a dish that packs a punch, try Chicken with Bacon and Pepper Jack. Wrap thinly sliced chicken breasts with bacon and top with pepper jack cheese for a melt-in-your-mouth experience. The combination of smoky bacon and spicy cheese makes this recipe a crowd-pleaser. Serve with roasted potatoes or a green bean almondine for a complete meal.

Chicken Fajitas

Chicken Fajitas are a fun and flavorful way to enjoy thinly sliced chicken breasts. Marinate the chicken in a blend of lime juice, garlic, and traditional Mexican spices, then sauté with bell peppers and onions. Serve the fajita mixture in warm tortillas with your favorite toppings like sour cream, guacamole, and salsa for a customizable and interactive dining experience.

Each of these recipes showcases the versatility and ease of cooking with thinly sliced chicken breasts. By incorporating a variety of flavors and cooking methods, you can turn this simple ingredient into a multitude of delicious meals. Remember, the key to success is in the preparation and seasoning, so don’t be afraid to experiment with different herbs, spices, and sauces to create your own signature dishes.

Frequently Asked Questions

How do you not overcook a thin chicken breast?

Overcooking can turn a succulent thin sliced chicken breast into something dry and tough. Here are some tips to keep it juicy and flavorful:

  • Use a Meat Thermometer: Cook to the right temperature, 165°F (74°C), to ensure it’s done without overcooking.
  • Marinate Before Cooking: Marinating adds moisture and flavor, reducing the risk of drying out.
  • Cook on Medium Heat: High heat can cook the exterior too quickly. Medium heat allows the chicken to cook evenly.
  • Keep an Eye on the Clock: Because they’re thin, these chicken breasts cook fast. Depending on the method, they might need only a few minutes per side.

What is thin cut chicken breast called?

Thin cut chicken breast is often referred to as chicken cutlets. These are simply chicken breasts that have been sliced horizontally to create thinner pieces. This cut is particularly popular for its quick cooking time and versatility in thin sliced chicken breast recipes.

How long does it take to boil thin sliced chicken breast?

Boiling is a simple and healthy way to prepare thin sliced chicken breast. It typically takes about:

  • 10-15 Minutes: For thin slices, boiling in a pot of water or broth. Ensure the chicken is fully submerged and check for doneness by ensuring there’s no pink in the middle or by using a meat thermometer.

Is it better to bake chicken at 350 or 400?

The ideal temperature for baking thin sliced chicken breast can depend on several factors, including your recipe and personal preference. However, here are some considerations:

  • Bake at 350°F (177°C): For a more gentle cook, leading to a juicier chicken but with less browning.
  • Bake at 400°F (204°C): For a quicker cook and more caramelization or browning on the surface. This can add flavor but watch closely to avoid overcooking.

Is it better to cover chicken when baking?

Covering thin sliced chicken breast during baking can have benefits, but it depends on the outcome you desire:

  • Covered: Helps to keep the chicken moist by trapping steam, which can be beneficial for preventing drying out. Ideal for a tender, juicy result.
  • Uncovered: Allows the surface of the chicken to brown and crisp up, adding texture and flavor. Just be sure to monitor it to prevent overcooking.

Conclusion

Wrapping Up: The Essence of Thinly Sliced Chicken Breast Recipes

Reflecting on our journey through the world of thin sliced chicken breast recipes, it’s evident how these dishes embody versatility and convenience. Each recipe showcases the adaptability of this lean protein, making it a beloved choice for diverse culinary adventures.

The Heart of Versatility

  • Culinary Flexibility: Thin sliced chicken breasts shine across various cuisines, from the robust flavors of Italian Chicken Marsala to the zest of Mexican Chicken Fajitas. This versatility ensures a perfect dish for any occasion or craving.
  • Global Flavors: Embrace the opportunity to travel the world through flavors. Whether you’re in the mood for something comforting or exotic, these recipes provide a passport to culinary delight.

Time-Saving & Nutritious

  • Quick and Easy: The beauty of thinly sliced chicken breasts lies in their quick cooking time. Ideal for rushed dinners, they guarantee a delicious meal on the table in no time.
  • Health Forward: Opting for thin sliced chicken breasts means choosing a healthy, protein-rich base for your meals, adaptable with herbs, spices, and sauces for a nutritious feast.

Meal Prep Mastery

  • Effortless Planning: Their ease of preparation makes thin sliced chicken breasts a cornerstone for efficient meal prep, ensuring a week filled with varied and exciting meals.

Unleash Your Creativity

  • Innovative Cooking: Beyond the discussed dishes, there lies a realm of creativity waiting to be explored with thin sliced chicken breasts. Dive into experimenting with flavors and textures to uncover new favorites.

In closing, the journey through thin sliced chicken breast recipes reinforces their invaluable role in the kitchen. From their swift cook time and health benefits to their unmatched adaptability, they are a testament to the joy and ease of cooking. As we embrace these recipes, we not only nourish our bodies but also enrich our culinary experiences, proving that simplicity can indeed lead to sophistication.

Can You Undercook Chicken of the Woods? Complete Guide

Introduction to Chicken of the Woods

Chicken of the Woods stands out in the fungal kingdom. Its vibrant colors and unique flavors make it a sought-after ingredient in kitchens worldwide. But, the question arises, “Can you undercook Chicken of the Woods?” Let’s delve into what makes this mushroom special and why proper preparation is crucial.

Understanding Chicken of the Woods

Chicken of the Woods, scientifically known as Laetiporus, is a fungus that grows on trees, particularly hardwoods like oak. Its name comes from its chicken-like taste and texture, making it a favorite among foragers and chefs alike.

Description and Characteristics

  • Appearance: This mushroom boasts bright orange, yellow, and sometimes red hues. It grows in large, overlapping brackets on tree trunks.
  • Texture: It has a meaty texture, similar to cooked chicken, hence its name.
  • Flavor: Described as rich, with a taste akin to chicken or even wild game.
  • Habitat: Prefers hardwoods, notably oak, but can be found on other trees as well.

Understanding these characteristics is essential, not only for identification but also for culinary use. The unique texture and flavor of Chicken of the Woods make it a versatile ingredient in dishes.

Can You Undercook Chicken of the Woods?

The simple answer is no. Like many mushrooms, Chicken of the Woods needs to be cooked thoroughly to be digestible and safe to eat. Here’s why:

  • Digestibility: Proper cooking breaks down the mushroom’s fibrous cell walls, making it easier to digest.
  • Safety: Cooking to the right temperature ensures any potential pathogens are killed.
  • Texture and Flavor: Full cooking brings out the best texture and flavor of the mushroom.

Key Takeaways for Preparation

  • Always Cook Thoroughly: To avoid the risk of indigestion or foodborne illness, ensure Chicken of the Woods is cooked completely.
  • Test for Tenderness: The mushroom should be tender and not rubbery or tough.
  • Flavor Enhancement: Proper cooking techniques can enhance its natural flavors, making it a delightful addition to various dishes.

Nutritional Value

Chicken of the Woods (Laetiporus sulphureus) not only captivates with its vibrant hues but also offers significant nutritional benefits. Here’s a breakdown of its nutritional highlights:

  • Low in Calories: This mushroom is perfect for those keeping an eye on their calorie intake, allowing for savory enjoyment without calorie worries.
  • High in Protein: Offering an excellent protein source, it’s ideal for vegetarians and vegans looking for non-animal protein options.
  • Rich in Fiber: It provides essential carbs and dietary fiber, supporting digestion and making you feel full.
  • Low in Fat: With minimal fat content, it’s heart-friendly, aiding in reducing heart disease risks.
  • Antioxidants Galore: Loaded with flavonoids and phenols, it fights oxidative stress and inflammation, protecting against chronic diseases.

Adding Chicken of the Woods to your diet diversifies your meals and boosts nutrition.

Culinary Uses

Chicken of the Woods is as versatile in the kitchen as it is nutritious. Its chicken-like texture and flavor make it a hit for various recipes. Popular uses include:

  • Sautéing: Quick sautéing with garlic and herbs unleashes its flavors, perfect as a side or main.
  • As a Meat Substitute: It’s a great stand-in for chicken, enriching any recipe with depth and texture.
  • In Stews and Soups: It brings a meaty element to hearty dishes, enhancing flavor.

The secret to its best use lies in correct identification and cooking. It’s essential to cook it thoroughly to avoid any health risks associated with undercooking. Properly prepared, Chicken of the Woods not only enhances a wide range of dishes but does so safely, allowing everyone to enjoy its nutritional and culinary benefits fully.

Identifying Chicken of the Woods

Discovering Chicken of the Woods can turn a simple walk in the woods into an exciting foraging adventure. However, correctly identifying this mushroom is crucial, especially when considering questions like “Can you undercook Chicken of the Woods?” Let’s dive into the key identification features and its preferred habitats.

Key Identification Features

Chicken of the Woods stands out due to its distinct characteristics:

  • Vibrant Colors: Look for bright orange to yellow hues, often with a hint of red.
  • Shelf-like Structure: This fungus grows in large, overlapping brackets.
  • Size: Brackets can span up to 20 inches across.
  • Texture: Young specimens are soft, becoming tougher with age.

These features are not just visually striking but also help distinguish Chicken of the Woods from potential look-alikes.

Location and Habitat

Understanding where to find Chicken of the Woods enhances your chances of successful foraging:

  • On Trees: Primarily grows on dead or dying hardwood trees, such as oaks.
  • Forest Edges and Open Woods: Often found in these areas, where there is plenty of sunlight.
  • Throughout the World: While more common in North America and Europe, it can be found worldwide.

Identifying Chicken of the Woods requires a keen eye for its unique features and knowledge of its preferred habitats. Remember, while it’s a sought-after mushroom for its meaty texture and flavor, the importance of proper preparation comes to the forefront, especially in light of concerns about undercooking. Always ensure it’s fully cooked to avoid potential issues, as consuming it raw or undercooked could lead to digestive discomfort for some people.

Physical Appearance

The physical appearance of Chicken of the Woods is not only unique but also a key factor in its identification and culinary use. Its distinctive characteristics set it apart from other mushrooms, making it a favorite among foragers. However, when discussing whether “Can you undercook Chicken of the Woods?”, understanding these physical traits becomes crucial.

Distinctive Characteristics

  • Color: Bright shades of orange, yellow, and sometimes red are hallmark signs. The vivid colors fade as the mushroom ages.
  • Texture: Young specimens have a soft, almost moist texture, ideal for cooking. As they age, they become tougher and less palatable.
  • Shape: This fungus grows in large, shelf-like clusters that can span several feet across a host tree.
  • Surface: The top is smooth and slightly velvety, lacking the gills commonly seen on the underside of other mushrooms.

These characteristics are not just visual cues for identification but also indicators of the mushroom’s age and edibility.

Differences from Similar Species

Distinguishing Chicken of the Woods from similar species is essential for foraging safety and culinary quality.

  • Jack O’Lantern (Omphalotus olearius): Although similar in color, Jack O’Lantern mushrooms have gills and are poisonous. They also grow in clusters but on the ground, often around stumps or buried wood.
  • False Turkey Tail (Stereum ostrea): This look-alike has similar colors but grows in smaller, fan-shaped brackets without the thick, meaty body of Chicken of the Woods. It’s not poisonous but lacks the flavor and texture that make Chicken of the Woods sought after.

When considering the question, “Can you undercook Chicken of the Woods?”, the physical characteristics offer a guide to its readiness for consumption. The soft, moist texture of younger specimens is ideal for cooking, ensuring that it can be thoroughly cooked through. This is crucial, as undercooked Chicken of the Woods may be tough and could potentially cause gastrointestinal discomfort, underlining the importance of proper preparation and cooking to fully enjoy its flavors and nutritional benefits.

The Risks of Undercooking

Understanding the dangers of undercooking Chicken of the Woods is crucial for ensuring both the safety and enjoyment of this distinctive mushroom. The article outlines several key concerns and offers invaluable insights into properly enjoying Chicken of the Woods without health risks.

Potential Health Concerns

  • Digestive Issues: Undercooked Chicken of the Woods can lead to stomach upset and other digestive problems. The mushroom’s complex compounds require adequate cooking to break down into digestible forms.
  • Allergic Reactions: For some, even well-cooked Chicken of the Woods might trigger allergic reactions, such as nausea and swelling. Starting with a small portion is wise to gauge individual tolerance.
  • Toxicity from Misidentification: Incorrectly identifying Chicken of the Woods and confusing it with toxic species can have serious health implications. Accurate identification is paramount to avoid consuming potentially harmful fungi.
  • Contaminant Absorption: Chicken of the Woods absorbs toxins from its environment. Mushrooms collected from polluted areas might carry harmful substances, regardless of cooking duration.

Importance of Thorough Cooking

Thorough cooking transforms Chicken of the Woods into a safe, enjoyable food, mitigating the risks of digestive issues and ensuring the mushroom’s nutrients are bioavailable. The article stresses:

  • Proper Heat Treatment: Cooking Chicken of the Woods thoroughly ensures that its fibrous structure softens, making it easier to digest and reducing the risk of gastrointestinal discomfort.
  • Nutrient Absorption: Adequate cooking also enhances the mushroom’s nutritional benefits, making its valuable proteins, carbohydrates, and antioxidants more accessible to the body.

How Undercooking Affects Nutrient Absorption

Undercooking not only poses risks to digestive health but also impacts the body’s ability to absorb the mushroom’s nutrients effectively. The article highlights:

  • Reduced Protein Availability: Without sufficient cooking, the proteins in Chicken of the Woods remain locked within the mushroom’s fibrous cells, making them less available for absorption.
  • Antioxidant Efficacy: The full antioxidant potential of Chicken of the Woods is best realized when the mushroom is cooked properly, as heat releases these beneficial compounds.

By emphasizing these points, the guide on Delicious Chef (When to Avoid Chicken of the Woods? Complete Guide) serves as a critical resource for anyone looking to safely incorporate Chicken of the Woods into their diet. Understanding the importance of thorough cooking and recognizing the conditions under which Chicken of the Woods should be avoided are key to enjoying this unique mushroom without compromising health.

Proper Preparation Techniques

Preparing Chicken of the Woods correctly is essential, not only to enhance its flavors but also to ensure it’s safe to eat. Given concerns like “Can you undercook Chicken of the Woods?”, starting with proper cleaning and preparation is crucial. This section will guide you through the steps to clean and prepare this unique mushroom, ensuring it’s ready for cooking.

Cleaning and Preparing Chicken of the Woods

Before cooking, Chicken of the Woods must be thoroughly cleaned and prepared. This process is vital to remove any dirt, debris, or insects and to ensure the mushroom is safe and pleasant to eat.

Step-by-step Cleaning Process

  1. Visual Inspection: Begin by inspecting the mushroom for any signs of decay or insect damage. Trim off any affected areas.
  2. Brushing Off Dirt: Use a soft brush or damp cloth to gently remove dirt and debris from the surface. Avoid soaking the mushroom, as it can absorb water and become soggy.
  3. Rinsing (If Necessary): If the mushroom is particularly dirty, a quick rinse under running water can be performed. Shake off excess water and pat dry with paper towels.

Cleaning Chicken of the Woods properly ensures that any external contaminants are removed, making it safe for consumption.

Cutting and Portioning for Cooking

Once cleaned, Chicken of the Woods needs to be cut and portioned for cooking. The way you cut the mushroom can affect its texture and cooking time.

  • Slicing: Cut the mushroom into even slices or strips. This is ideal for sautéing or frying, as the pieces will cook evenly.
  • Chunking: For stews or soups, cutting the mushroom into larger chunks can be beneficial. They’ll absorb flavors while maintaining a meaty texture.
  • Leave Whole: For roasting or grilling, consider leaving larger pieces whole. This method allows for a crispy exterior and tender interior.

Properly cutting and portioning Chicken of the Woods not only enhances its texture and flavor during cooking but also ensures it can be thoroughly cooked through. This is particularly important when addressing concerns about undercooking. Fully cooking the mushroom is essential to avoid potential texture issues or gastrointestinal discomfort.

Cooking Methods and Tips

Cooking Chicken of the Woods properly is essential not just for taste, but also for safety. Given the concern, “Can you undercook Chicken of the Woods?”, understanding the recommended cooking temperatures, times, and best practices is key. Furthermore, exploring creative recipes can transform this unique mushroom into a culinary delight.

Recommended Cooking Temperatures and Times

  • Sautéing: Cook slices or chunks over medium heat for 5-7 minutes on each side, or until golden brown and tender.
  • Baking: Preheat the oven to 375°F (190°C) and bake for 20-30 minutes, depending on thickness, until the edges are crispy.
  • Grilling: Grill over medium-high heat for 5-10 minutes on each side, ensuring the mushroom is thoroughly cooked through.

These guidelines help in achieving the perfect texture and flavor, ensuring Chicken of the Woods is fully cooked and safe to eat.

Best Practices for Ensuring Thorough Cooking

  • Even Sizing: Cut the mushroom into even-sized pieces to ensure uniform cooking.
  • Pre-cooking: For larger recipes, pre-cook Chicken of the Woods before adding it to dishes like stews or casseroles.
  • Temperature Check: While there’s no specific temperature to check for doneness as with meat, ensure the mushroom is tender and hot throughout.

Adhering to these practices addresses the worry of undercooking, making the mushroom both safe and enjoyable to eat.

Creative Recipes and Uses

Chicken of the Woods offers a versatile flavor profile that can be incorporated into numerous dishes:

  • Vegetarian Stir-Fry: Replace chicken with Chicken of the Woods in your favorite stir-fry recipe for a vegetarian twist.
  • Mushroom Tacos: Sautéed mushroom strips make for a delicious taco filling, seasoned with your choice of spices.
  • Creamy Mushroom Soup: Blend cooked Chicken of the Woods into a rich, creamy soup for a comforting meal.

These ideas not only showcase the mushroom’s versatility but also ensure it’s thoroughly cooked, mitigating concerns about undercooking.

FAQ: Chicken of the Woods

Can you eat Chicken of the Woods raw?

No, eating Chicken of the Woods raw is not recommended. Like many mushrooms, it should be cooked thoroughly to ensure it’s safe to eat. Raw Chicken of the Woods can be tough and may cause gastrointestinal discomfort for some people.

How do you know if Chicken of the Woods is cooked thoroughly?

To ensure Chicken of the Woods is cooked thoroughly, look for the following signs:

  • The texture becomes softer and more palatable.
  • The color may darken slightly, and the edges can become crispy when sautéed, baked, or grilled.
  • It should be hot throughout, indicating that it has been cooked evenly.

There’s no exact temperature to check for doneness as with meats, but these visual and textural cues will help determine if it’s been cooked properly.

Are there any parts of Chicken of the Woods that shouldn’t be eaten?

Yes, certain parts of Chicken of the Woods should be avoided:

  • The Base: The woody base or part attached to the tree is typically too tough to eat.
  • Older Portions: Older, tougher portions of the mushroom may be less palatable and harder to digest.
  • Discolored Areas: Any parts that show signs of mold or significant discoloration should be discarded.

Focusing on the tender, colorful, and fresh parts of the mushroom will ensure the best culinary experience.

How can you tell if Chicken of the Woods has gone bad?

Signs that Chicken of the Woods has gone bad include:

  • Soft, Slimy Texture: A sign of decay, different from the mushroom’s natural firmness.
  • Unpleasant Odor: Any off-smelling or foul odors are clear indicators that the mushroom should not be consumed.
  • Mold or Major Discoloration: White, green, or black spots, or significant fading of its vibrant colors, suggest spoilage.

Responsible Foraging

Sustainable Foraging Practices

  • Ethical Harvesting: Engage in harvesting practices that sustain or enhance the natural environment. Limiting harvests to a small percentage of available plants ensures species regeneration and ecosystem health.
  • Environmental Impact: Foraging should leave minimal to no impact on the environment. This includes avoiding trampling undergrowth and disturbing wildlife habitats.

Health and Safety Precautions

  • Avoiding Contaminated Areas: Forage away from polluted areas to prevent ingesting harmful substances that mushrooms may absorb. Roadsides and industrial zones often contain high levels of toxins harmful to both humans and fungi.
  • Recognizing and Avoiding Toxic Look-alikes: Accurate identification is crucial as many edible mushrooms have toxic counterparts. Utilize multiple resources for identification, such as field guides and expert consultations.

For a comprehensive understanding of safe and sustainable foraging practices, “A Forager’s Checklist for Safe, Sustainable & Ethical Foraging” on Gather & Grow offers invaluable insights. This guide emphasizes the joy and responsibility tied to foraging, highlighting how to engage with nature respectfully and sustainably.

Additionally, for those new to foraging or looking to deepen their practice, United Plant Savers provides an extensive list of at-risk plants, promoting awareness and conservation in the foraging community.

Lastly, the Leave No Trace Center for Outdoor Ethics offers principles that extend beautifully into foraging, ensuring that our interactions with the natural world are respectful and minimally invasive, protecting these resources for generations to come.

Conclusion

In conclusion, responsible foraging for Chicken of the Woods requires more than just the ability to identify and harvest this unique mushroom. It demands a deep respect for the environment, understanding the delicate balance of ecosystems, and a commitment to sustainable practices. As foragers, it’s our duty to ensure that our actions do not harm the natural habitats from which we draw sustenance. This means practicing ethical harvesting, avoiding contaminated areas, and being vigilant about not collecting protected or endangered species.

The importance of thorough cooking cannot be overstated, as it not only enhances the culinary experience but also safeguards against potential health risks associated with undercooking. By adhering to these guidelines, we foster a reciprocal relationship with nature, one that allows for the enjoyment of foraging while maintaining the health and vitality of our natural world. The practice of foraging, especially for Chicken of the Woods, is not merely about collecting food; it’s a lesson in ecology, conservation, and ethical stewardship.

How to Cook Ground Venison So It Doesn’t Taste Gamey?

Introduction to Ground Venison

Ground venison stands out in the world of game meats, celebrated for its lean quality and rich flavors. As a versatile ingredient, it can be incorporated into a myriad of recipes, from classic burgers to exotic dishes. However, the gamey taste of venison can be a point of concern for some. Understanding ground venison and how to cook it properly is key to enjoying its unique taste without the overpowering gamey flavor.

Understanding Ground Venison

Venison, the meat of deer, is known for its health benefits, being lower in fat and higher in vitamins compared to traditional meats like beef or pork. Ground venison, in particular, offers a fantastic alternative for those looking to make healthier meal choices without compromising on taste.

Overview of Venison as a Lean Game Meat

  • Lean Protein Source: Venison is renowned for its high protein content and low fat, making it an excellent choice for a lean diet.
  • Rich in Nutrients: Packed with iron, B vitamins, and other essential nutrients, venison supports a balanced diet.
  • Versatile Cooking Ingredient: Whether in meatballs, tacos, or pasta sauces, ground venison can be used in a plethora of dishes, adapting well to various cuisines and flavors.

Common Concerns about the Gamey Taste

The distinct gamey taste of venison is often attributed to the animal’s diet and living conditions. While some relish this unique flavor, others may find it off-putting. The good news is that there are several ways to mitigate this taste:

  • Marinating: Using acidic components like vinegar or lemon juice can help neutralize gamey flavors.
  • Mixing with Other Meats: Blending ground venison with beef or pork can soften its intense taste.
  • Adding Spices and Herbs: Generous seasoning with herbs and spices can enhance venison’s flavor, masking any unwanted gameyness.

How Do You Cook Ground Venison So It Doesn’t Taste Gamey?

The key to cooking ground venison that’s free from an overpowering gamey taste lies in preparation and cooking techniques. Here are some tips:

  • Preparation: Begin with a marinade or soak the ground venison in milk for a few hours before cooking to reduce gamey flavors.
  • Cooking Method: Slow cooking or simmering in sauces can mellow the taste of venison, making it more palatable.
  • Flavor Pairings: Incorporate bold flavors and spices that complement venison’s rich taste. Ingredients like garlic, onions, and herbs such as rosemary or thyme work well.
  • Fat Content: Since venison is very lean, adding a small amount of fat like olive oil or butter during cooking can improve texture and flavor.

Preparing Ground Venison

Selecting Quality Meat

Choosing fresh, high-quality venison is crucial. The color of the meat can be a good indicator of freshness; look for venison that has a deep, rich red color without any grayish tones. It’s also essential to source venison from a reputable supplier, whether it’s a local butcher who specializes in game meat or a trusted hunter. The way the venison was processed and stored before it reaches you significantly affects its quality and flavor.

  • Freshness is key: opt for venison that smells neutral and looks vibrant.
  • Consider the source: wild venison may have a stronger flavor compared to farm-raised.

The Impact of the Deer’s Diet on Flavor

The diet of the deer significantly influences the flavor of venison, highlighting the intricate relationship between nature and our dining experience. When considering the best way to cook Chicken of the Woods, understanding this natural connection becomes crucial. Deer that feast on a rich variety of forest offerings, such as acorns and lush underbrush, provide meat with a depth of flavor unmatched by those with less varied diets. This richness in taste parallels the savory, earthy notes found in Chicken of the Woods, emphasizing the importance of natural ingredients in achieving culinary excellence.

Enhancing Flavor through Nature’s Bounty

Just as the deer’s diet enriches its meat, the environment in which Chicken of the Woods mushrooms grow imparts unique flavors, making them a sought-after ingredient for those pursuing the best way to cook Chicken of the Woods. Incorporating these mushrooms into venison dishes not only adds a layer of complexity but also aligns with the ethos of cooking with wild, foraged ingredients.

Transitioning to the Kitchen

In the kitchen, embracing these natural flavors allows for a culinary exploration that respects and highlights the origins of our food. Whether slow-cooking venison to tender perfection or sautéing Chicken of the Woods with garlic and herbs, the key lies in allowing these wild flavors to shine. Thus, the best way to cook Chicken of the Woods involves a synergy of ingredients, where each element enhances the others, resulting in dishes that are both flavorful and reflective of the natural world.

Flavor Enhancement Techniques

Ground venison, while nutritious and lean, often carries a distinct gamey flavor that may not appeal to everyone. However, with the right preparation methods, such as marinating, you can significantly enhance its taste, making it a versatile and delicious option for various dishes.

Marinating Ground Venison

Marinating is a critical technique in both tenderizing meat and infusing it with flavors that can help mask or reduce the gamey taste. The process involves soaking the meat in a mixture of acids, oils, and seasonings for several hours or even days, depending on the recipe. Here’s how marinating can transform ground venison:

How Marinating Can Reduce Gamey Flavors

  • Acidic Ingredients: Ingredients like vinegar, lemon juice, or wine break down proteins in the meat, tenderizing it and allowing it to absorb flavors more effectively.
  • Fat Addition: Oils in marinades help introduce fat into the lean venison, enhancing its moisture and flavor.
  • Flavor Infusion: The herbs and spices in marinades penetrate the meat, overshadowing the gamey taste with more desirable flavors.

Marinating not only improves the texture and taste of ground venison but also makes it more adaptable to a broader range of recipes, from burgers and meatballs to tacos and lasagnas.

Recommended Marinade Recipes

To get the most out of your ground venison, consider these marinade ideas:

  • Basic Herb and Garlic Marinade:
    • Olive oil
    • Minced garlic
    • Chopped fresh rosemary and thyme
    • Salt and pepper
    • Combine ingredients and marinate the ground venison for at least 4 hours or overnight for best results.
  • Red Wine and Berry Marinade:
    • Dry red wine
    • Mixed berries (blackberries or cherries work well)
    • Balsamic vinegar
    • A touch of honey
    • This marinade is perfect for adding a sweet and tart edge to venison, masking gamey notes.
  • Spicy Citrus Marinade:
    • Orange and lime juice
    • Olive oil
    • Chopped cilantro
    • Minced jalapeño or chili flakes for heat
    • Salt and cumin
    • Ideal for a zesty, flavorful kick that complements venison’s rich taste.

Marinating ground venison is a crucial step in ensuring your dishes are free from the gamey taste, answering the question of how do you cook ground venison so it doesn’t taste gamey. This technique not only mitigates concerns about the gamey flavor but also broadens the culinary scope, allowing the meat to integrate flawlessly with a variety of cuisines and recipes. Through the exploration of different marinades, you’ll unlock the ideal flavor profile that resonates with your taste preferences, elevating ground venison to a gourmet level that’s both nutritious and palatable. Whether crafting a straightforward dinner on a busy weeknight or a sophisticated dish for entertaining, these marinating methods guarantee that your ground venison creations will impress every time.

Incorporating Fats

Enhancing ground venison with fats can significantly improve its moisture and flavor. This technique is crucial for cooking venison that doesn’t taste gamey.

Adding Moisture and Flavor Through Fats

Selecting the appropriate fats is essential for enriching venison. Various options offer unique benefits:

  • Butter or Ghee: Adds a creamy texture and richness.
  • Olive Oil: Introduces healthy fats and a fruity flavor.
  • Bacon Fat: Provides a smoky, savory element.

A balanced approach ensures the natural taste of venison remains prominent.

Selecting Fats for Optimal Flavor

Each fat choice contributes differently:

  • Butter: Enhances mouthfeel.
  • Olive Oil: Brings subtle notes.
  • Bacon Fat: Deepens flavors.

The aim is to complement, not overshadow, the venison’s flavor.

Blending for Flavor Balance

Mixing venison with other meats can reduce its gamey taste. This method introduces fat and creates a nuanced flavor profile.

Effective Meat Combinations

  • Ground Pork: Adds fat and mild flavor.
  • Ground Beef: Offers a classic taste and moisture.
  • Ground Lamb: Provides richness and complexity.

A 50/50 mix is a good starting point, adjustable to taste.

Choosing Complementary Meats

Each meat brings something unique:

  • Pork: Ensures moisture.
  • Beef: Balances flavor.
  • Lamb: Introduces depth.

Experimenting with ratios can customize the blend to your preference.

Incorporating fats and blending meats are key strategies for preparing delicious venison. By focusing on these techniques, you can create dishes that highlight venison’s qualities without the gamey aftertaste.

Cooking Methods That Reduce Gamey Flavor

Addressing the challenge of “How do you cook ground venison so it doesn’t taste gamey” is essential for those looking to enjoy venison’s rich flavors without the overpowering gamey taste. Luckily, specific cooking techniques, particularly slow cooking, can significantly reduce this characteristic flavor, transforming ground venison into a versatile and delectable option for a myriad of recipes. This article delves into how slow cooking can tame the gamey taste of venison and offers ideal recipes that highlight the meat’s potential in slow-cooked dishes.

Slow Cooking

Benefits of Slow Cooking Venison

  • Tenderness: Slow cooking at low temperatures allows the tough fibers in venison to break down over time, resulting in tender, fall-apart meat.
  • Flavor Enhancement: The slow cooking process gives time for the flavors of seasonings and marinades to penetrate the venison, enhancing its natural taste and reducing gameyness.
  • Moisture Retention: Slow cooking in a closed environment helps to lock in moisture, preventing the venison from drying out, which is crucial given venison’s low-fat content.

Ideal Recipes for Slow-Cooked Venison Dishes

  1. Venison Chili: A hearty and warming dish, perfect for cold days. Incorporate beans, tomatoes, and a blend of spices. Slow cooking allows the flavors to meld beautifully.
  2. Venison Stew: A classic comfort food, slow-cooked with root vegetables, broth, and herbs, offering a succulent and hearty meal.
  3. Barbecue Venison: Slow-cooked until tender and then finished with a rich barbecue sauce, this dish is ideal for pulling and serving on buns or with sides.

For those interested in exploring more venison recipes or understanding the nuances of cooking with venison, consider checking out resources such as Ground Venison Recipes: From Burgers to Global Dishes. Additionally, for a deep dive into the benefits of incorporating venison into your diet, the article Is Venison Healthier Than Beef? provides valuable insights.

Grilling and Broiling

High-heat cooking methods like grilling and broiling offer a fantastic way to cook ground venison, adding rich flavors and a delightful texture. These methods can intensify the meat’s natural tastes, making it a favorite for many who enjoy game meat without the gamey aftertaste.

Enhancing Flavor with High-Heat Cooking

Grilling and broiling utilize direct, high heat, which can significantly enhance the flavor of ground venison. These methods are ideal for:

  • Caramelizing the Surface: High heat creates a caramelized, crispy exterior while keeping the inside tender.
  • Retaining Juices: Quick cooking seals in the meat’s juices, ensuring that the venison remains moist and flavorful.
  • Introducing Smoky Notes: Grilling, especially over charcoal or wood, adds a unique smoky flavor that complements venison’s natural taste.

These cooking techniques not only improve the meat’s flavor but also offer a texture that’s hard to achieve with other methods.

Tips for Grilling Venison Without Drying It Out

Venison’s lean nature means it can dry out quickly on a hot grill. To avoid this:

  • Preheat the Grill: Ensure your grill is hot before adding the meat to get a good sear quickly.
  • Use a Marinade: Marinating venison can add moisture and fat, which helps to keep it juicy during cooking.
  • Avoid Overcooking: Venison is best enjoyed medium-rare to medium. Use a meat thermometer to avoid guessing.
  • Let It Rest: After grilling, let the meat rest for a few minutes to allow juices to redistribute throughout the meat.

Selecting the Right Fats for Grilling

Incorporating fats can make a significant difference:

  • Brush with Oil: Lightly brush the venison with olive oil before grilling to add moisture and prevent sticking.
  • Add Fatty Ingredients: Mixing ground venison with fattier meats or adding bits of butter can enhance juiciness.

Broiling Tips for Perfect Venison

Broiling, much like grilling, provides direct heat that can quickly cook venison:

  • Positioning: Place the venison closer to the heat source for a short time to sear the outside while keeping the inside moist.
  • Turn Frequently: This prevents burning and ensures an even cook throughout the meat.
  • Marinades Are Key: A good marinade can protect the meat’s surface, reducing the risk of drying out.

Grilling and broiling stand out as prime techniques when pondering how do you cook ground venison so it doesn’t taste gamey. These high-heat methods are ideal for showcasing the leanness of venison while ensuring the meat remains free from any undesirable gamey taste. By integrating strategic tips, such as judiciously incorporating fats and monitoring the cooking process closely, you’re guaranteed to produce a succulent, richly flavored dish. This approach underscores venison’s adaptability across a spectrum of culinary creations, from casual burgers to upscale steaks. Embracing proper preparation techniques will effortlessly incorporate venison into your grilling and broiling endeavors, offering nourishing and appealing meals that cater to diverse taste preferences.

Best Spices for Ground Venison

The unique flavor profile of ground venison can be significantly improved by carefully selecting the right spices. This approach addresses the common query of how do you cook ground venison so it doesn’t taste gamey. Opt for spices that not only enhance but also help to conceal the gamey taste, achieving a perfect harmony that enriches the venison without dominating its natural flavors.

  • Rosemary and Thyme: These herbs lend a woody, earthy backdrop that pairs well with the robust nature of venison.
  • Juniper Berries: Offering a sharp, piney taste, juniper berries can cut through the gamey flavor, adding an intriguing note to your dishes.
  • Garlic and Onions: For grounding the venison’s flavor, these kitchen staples are indispensable. They provide a savory base that allows other flavors to shine.
  • Smoked Paprika: This spice adds a subtle smokiness and a touch of warmth, complementing the venison’s rich taste.
  • Bay Leaves: Adding a complex layer of flavor, bay leaves work well in slow-cooked dishes, infusing the venison with a subtle, herbal essence.

When cooking venison, consider the meat’s lean nature and ensure your spice blend doesn’t dry it out further. Adding a bit of fat, like olive oil, can help carry these flavors more effectively. For detailed guidance on the best fats to use with venison, exploring resources like Jessi Fearon’s insights on cooking deer meat can be incredibly helpful.

Creating Your Own Venison Seasoning Mix

Crafting a homemade venison seasoning mix allows for customization to your taste preferences and the specific dish you’re preparing. Here’s a basic framework to start from, with room for experimentation:

  • Start with equal parts salt and black pepper as your base.
  • Add aromatic herbs like rosemary and thyme, aiming for a balanced blend.
  • Incorporate garlic powder and onion powder for depth.
  • For a hint of warmth, sprinkle in smoked paprika and a touch of cayenne.
  • Consider unique additions like ground juniper berries for a distinctive flavor twist.

Mix these spices in a bowl, adjusting quantities to taste. Store your venison seasoning mix in an airtight container, ready to transform your next ground venison dish into something special. For more venison cooking inspiration, including how to leverage spices to their fullest, Hank Shaw’s ground venison recipes offer a treasure trove of ideas worth exploring.

FAQ’s

Common Questions About Cooking Venison

When it comes to cooking venison, ensuring a delicious outcome without the meat becoming dry or overly gamey is a common concern. Here are some frequently asked questions that can guide you through the process of cooking venison, especially ground venison, to achieve the best results.

How Can I Ensure Venison Doesn’t Dry Out During Cooking?

Venison is leaner than beef, making it more susceptible to drying out. Here are ways to keep it moist:

  • Low and Slow Cooking: Cooking venison at a lower temperature for a longer period can help maintain its moisture.
  • Adding Fats: Mixing in a small amount of fat, like olive oil or even bacon fat, can help keep ground venison moist.
  • Barding: Covering venison cuts with a layer of fat or bacon can protect it during cooking, adding both moisture and flavor.

Are There Specific Cuts of Venison That Are Less Gamey?

Yes, the gamey taste varies with different cuts:

  • Tenderloin and Backstrap: These cuts are known to be less gamey because of their tenderness and location on the deer. They are ideal for quick cooking methods.
  • Shoulder and Legs: These cuts may have a stronger flavor due to more muscle use by the animal. Slow cooking these cuts can help mellow the gamey taste.

Can Ground Venison Be Used in Any Recipe That Calls for Beef?

Ground venison is a versatile substitute for beef in many recipes. However, consider these adjustments:

  • Add Fats: Because venison is leaner, adding a bit of fat can improve both taste and texture.
  • Adjust Cooking Times: Venison might cook faster due to its lower fat content, so watch cooking times to avoid drying it out.
  • Taste Adjustment: You may want to adjust seasonings, as venison’s unique flavor can alter the taste profile of the dish.

Conclusion

In conclusion, the journey to mastering the art of cooking ground venison lies in the strategic selection and use of spices that complement its rich, natural flavors while masking any potential gamey undertones. By incorporating a thoughtful blend of rosemary, thyme, juniper berries, garlic, onions, smoked paprika, and bay leaves, cooks can transform ground venison into a succulent, flavorful dish that appeals to a wide range of palates. Crafting your own venison seasoning mix not only allows for customization based on individual taste preferences but also opens up a world of culinary creativity, enabling each dish to be a unique gastronomic experience.

Irrespective of your culinary expertise, mastering the art of seasoning ground venison is pivotal in transforming it from a daunting component to a lauded highlight of any dish. This journey of culinary discovery, centered on the question of how do you cook ground venison so it doesn’t taste gamey, hinges on patience and a readiness to experiment with diverse spice mixes and cooking methods. Embracing and exploiting the unique characteristics of ground venison with an open mind and innovative approach will unlock its vast potential as a delicious and versatile game meat.

What flavors go with venison? Ultimate Guide

Introduction to Venison

Venison, the culinary term for deer meat, has a rich heritage that spans continents and cultures. Historically, it was a staple for many, from European nobility to Native American tribes. Its significance goes beyond mere sustenance, reflecting social status, survival, and tradition. Today, venison is appreciated for its flavor, versatility, and health benefits, making it a sought-after ingredient in culinary circles.

Brief History of Venison in Cuisine

Venison’s roots in cuisine are as old as the practice of hunting itself. Initially, it was a source of food for early humans, evolving into a symbol of prestige among the aristocracy in medieval Europe. Hunting rights were strictly regulated, making venison a luxury for the elite. In other parts of the world, such as North America, venison was a crucial part of the indigenous diet, valued for its availability and nutritional value. Over time, venison has transitioned from a survival necessity to a gourmet choice, celebrated in modern kitchens for its rich flavor and historical significance.

Health Benefits and Nutritional Value

Venison stands out for its health benefits and nutritional profile. It is:

  • Leaner than beef, reducing calorie intake.
  • Rich in protein, supporting muscle growth and repair.
  • Loaded with iron, enhancing blood health.
  • A source of B vitamins, crucial for energy production.

These attributes make venison an excellent choice for those looking to maintain a healthy diet without sacrificing taste.

What Flavors Go with Venison?

Pairing the right flavors with venison can elevate it from good to exquisite. Venison’s rich, gamey taste pairs well with both bold and subtle flavors, offering a versatile canvas for culinary experimentation.

Fruits and Sweetness

  • Blackberries: Their tartness complements the richness of venison.
  • Cherries: Offer a sweet contrast, enhancing the meat’s depth.
  • Apples: Provide a subtle sweetness, perfect for autumn dishes.

Herbs and Spices

  • Rosemary: Its earthiness matches venison’s gamey notes.
  • Juniper berries: A classic pairing, especially with wild game, adding a unique, piney flavor.
  • Thyme: Brings a subtle, aromatic touch, suitable for various venison dishes.

Savory and Umami Flavors

  • Bacon: Adds fat, enriching venison’s lean texture.
  • Mushrooms: Their umami complements venison’s robust flavor.
  • Red wine: Offers depth and complexity, perfect for marinades and sauces.

Understanding the balance of flavors that complement venison is key to unlocking its culinary potential. Experimenting with these pairings can lead to delightful dishes that highlight the meat’s unique qualities. Whether you’re crafting a hearty stew or a refined sauce, knowing what flavors go with venison will ensure a delicious outcome.

Understanding Venison’s Unique Flavor Profile

Venison, a term primarily used to describe deer meat, offers a distinctive taste that sets it apart from other types of meat. Its flavor is deeply influenced by various factors, including the animal’s age, diet, and the method of preparation. This section delves into what makes venison’s flavor unique, comparing it with other meats and exploring the elements that affect its taste.

Comparison with Other Types of Meat

Venison is often praised for its rich, gamey flavor, a characteristic that distinguishes it from the more commonly consumed beef, chicken, or pork. Here’s a brief comparison:

  • Beef: Venison is leaner with a more complex flavor profile.
  • Chicken: Offers a milder taste than venison’s robust flavor.
  • Pork: Venison provides a gamey alternative to pork’s sweet undertones.

The distinct taste of venison is a result of its wild nature, as opposed to the more neutral flavors of farm-raised animals.

Factors Affecting Venison’s Taste

Several factors contribute to the unique flavor profile of venison, making it a versatile ingredient in the kitchen.

  • Age: Older deer tend to have a stronger, more pronounced gamey taste compared to younger ones.
  • Diet: Wild deer that forage on a diverse range of plants, nuts, and berries impart nuanced flavors to the meat, unlike those with a limited diet.
  • Preparation: The method of preparation significantly influences venison’s taste. Marinating, slow cooking, or grilling can enhance its flavor, making it more palatable.
Diet’s Impact

The natural diet of deer plays a crucial role in shaping the taste of venison. Deer that graze in rich, diverse environments tend to produce meat with a more complex flavor profile, including hints of the vegetation they consume.

Age Influence

Age not only affects the tenderness of the meat but also its taste. Younger deer usually yield tender and milder flavored meat, while older deer provide a stronger gamey taste, often requiring more thoughtful preparation to balance the flavors.

Preparation Techniques
  • Marinating: Helps in tenderizing the meat and infusing flavors, mitigating the gamey taste.
  • Slow Cooking: Breaks down the fibers, making the meat more tender and allowing flavors to develop.
  • Grilling: Imparts a smoky flavor, enhancing the meat’s natural taste.

Each of these factors—age, diet, and preparation—plays a pivotal role in determining the final taste of venison. By understanding these influences, cooks and chefs can better decide how to prepare and season venison to suit their culinary creations. Pairing venison with the right flavors not only complements its rich taste but can also transform it into a gourmet experience. Whether it’s through marinating, slow cooking, or experimenting with different herbs and spices, there are endless possibilities to explore the depths of venison’s flavor profile.

Flavor Pairings for Venison

Herbs and Spices That Enhance Venison

Traditional Herbs:

  • Rosemary: This robust herb adds a woody fragrance that complements the gamey taste of venison. It’s perfect for roasting or grilling venison cuts. Explore recipes that highlight rosemary with venison for a classic combination.
  • Thyme: With its subtle, earthy tones, thyme pairs wonderfully with venison, especially in slow-cooked dishes. It lends a gentle touch that brings out the meat’s natural flavors without overwhelming them.
  • Juniper Berries: Known for their unique, piney flavor, juniper berries offer a sharp contrast that cuts through the richness of venison, making them ideal for marinades and stews.

Exotic Spices:

  • Star Anise: This licorice-flavored spice adds a sweet, aromatic complexity to venison, perfect for braises and sauces. Its bold profile works well in balancing the robust flavors of game meat.
  • Sumac: Offering a tart, lemony zing, sumac can brighten up venison dishes. Sprinkle it over cooked venison for a refreshing finish or use it in rubs for a burst of citrusy contrast.

Incorporating these herbs and spices into your venison cooking not only enhances the meat’s natural flavors but also introduces a delightful array of tastes that make each bite memorable. For more culinary inspirations, consider exploring ground venison recipes that range from traditional burgers to global dishes, showcasing the versatility of venison as a key ingredient in various cuisines.

Crafting dishes with venison doesn’t stop at choosing the right seasonings. The cooking technique also plays a crucial role in bringing out the best in this game meat. Whether it’s roasting, grilling, or slow cooking, each method offers a unique way to enjoy the deep, complex flavors of venison. By experimenting with different herbs, spices, and cooking techniques, you can create exquisite venison dishes that are sure to impress any gourmet enthusiast.

Fruits and Vegetables

Pairing the right fruits and vegetables with venison can enhance its rich, gamey flavor, making each bite a delightful experience. Seasonal produce like root vegetables and dark leafy greens, along with the sweet and tart accents of certain fruits, complement venison’s robust taste perfectly. This section explores the best fruit and vegetable pairings for venison, taking into account the seasonal availability and how these combinations can elevate the overall dish.

Seasonal Pairings

The changing seasons offer a variety of vegetables that pair wonderfully with venison, enriching its flavor and adding texture to the dish.

  • Root Vegetables: In the colder months, root vegetables like carrots, parsnips, and beets are excellent choices. Their earthiness complements the deep flavors of venison, and they can be roasted to perfection, offering a sweet contrast.
  • Dark Leafy Greens: For a touch of bitterness that balances the gamey taste, dark leafy greens such as kale, spinach, and swiss chard are ideal. They can be sautéed in garlic and olive oil, providing a simple yet flavorful side.

Root Vegetables

  • Carrots and parsnips bring sweetness, enhancing the meat’s natural flavors.
  • Beets offer a deep, earthy note that matches the intensity of venison.

Dark Leafy Greens

  • Kale adds a crunchy texture and a slightly bitter taste, creating a balance.
  • Spinach and swiss chard are more subtle, yet enrich the dish with their nutritional value and color.

Fruit Accents

Fruits can introduce a delightful contrast to venison’s flavor, with their sweetness and acidity cutting through the richness of the meat.

  • Blackberries: These berries are not just for desserts. When cooked down into a sauce, they add a lovely tartness that elevates the venison.
  • Cherries: Cherries, either fresh or in a compote, offer a sweet and sour flavor that complements the savory aspects of venison beautifully.
  • Apples: The classic combination of apples and pork is well-known, but apples also pair well with venison. Their subtle sweetness and slight acidity can be a perfect match for a rich venison stew or as an accompaniment to a roast.

Blackberries

  • The tartness of blackberries cuts through the richness, adding depth to the dish.

Cherries

  • Cherries bring a bright flavor contrast, enhancing the meat’s complex notes.

Apples

  • Apples, with their crisp sweetness, add a fresh dimension to venison dishes, whether used in sauces or as a side.

Utilizing fruits and vegetables in dishes with venison not only introduces a spectrum of flavors but also adds nutritional value. These pairings can transform a simple venison dish into a seasonal delight, showcasing the versatility of this game meat. Whether it’s the hearty warmth of roasted root vegetables in the winter or the refreshing tartness of berries in the summer, there’s a multitude of ways to complement venison with produce. Experimenting with these combinations allows for creative culinary explorations, ensuring that venison remains a beloved choice for discerning palates.

Cooking Techniques and Marinades

Mastering the art of cooking venison involves understanding the right techniques and marinades to enhance its flavor. Venison, known for its rich and gamey taste, benefits greatly from marination, which tenderizes the meat and infuses it with flavors. This section will explore the importance of marinating venison and provide recipe ideas for both wet and dry rubs, ensuring that your venison dishes are both delicious and tender.

Marinades and Rubs

Marinades and rubs play a crucial role in preparing venison, transforming it into a succulent and flavorful meal. Here’s why and how to use them:

Importance of Marinating Venison

  • Tenderizes: Venison is a lean meat. Marinating helps break down the fibers, making it tender.
  • Flavorful: It allows the meat to absorb spices and herbs, enhancing its natural flavors.
  • Moisture: Adds moisture to prevent the meat from drying out during cooking.

Marinating venison is not just a preliminary step; it’s a transformative process that elevates the meat’s texture and taste.

Recipe Ideas for Wet and Dry Rubs

Wet and dry rubs offer two pathways to flavoring venison, each with its unique set of benefits.

Wet Rubs
  • Red Wine and Herb Marinade:
    • Combine red wine, olive oil, rosemary, thyme, and garlic.
    • Marinate for at least 4 hours, or overnight for deeper flavor.
  • Balsamic and Berry Marinade:
    • Mix balsamic vinegar, blackberry jam, Dijon mustard, and olive oil.
    • Perfect for a balance of tart and sweet, marinate for a few hours before cooking.
Dry Rubs
  • Coffee and Spice Rub:
    • Mix ground coffee beans with brown sugar, paprika, salt, and black pepper.
    • Rub onto the venison and let it rest, allowing the flavors to penetrate.
  • Herb and Garlic Rub:
    • Combine dried rosemary, thyme, garlic powder, salt, and pepper.
    • Coat the venison generously before grilling or roasting.

Choosing the Right Marinade or Rub

Selecting between a wet or dry rub depends on the desired outcome:

  • Wet marinades are ideal for adding moisture and tenderizing.
  • Dry rubs create a crust that seals in flavors and juices.

Understanding the nuances of each method can significantly impact the final dish, providing a depth of flavor that complements the natural taste of venison.

Incorporating these marinades and rubs into your cooking repertoire can transform your venison dishes from ordinary to extraordinary. Whether you’re grilling, roasting, or sautéing, the right marinade or rub can make all the difference, ensuring your venison is flavorful, tender, and moist. Experimenting with different herbs, spices, and ingredients in your marinades and rubs can lead to a delightful discovery of flavors that go beautifully with venison, enhancing your culinary experience.

Recommended Cooking Methods

Understanding the ideal cooking methods for venison is essential to maximizing its flavor and tenderness. Venison, a meat known for its lean quality and rich taste, benefits significantly from careful preparation techniques. Here, we explore the pros and cons of slow cooking versus grilling and share tips to ensure your venison remains moist and tender.

Slow Cooking vs. Grilling: Pros and Cons

Slow Cooking:

  • Pros:
    • Enhances flavors through prolonged, gentle cooking.
    • Breaks down tougher fibers, resulting in tender meat.
    • Ideal for less tender cuts, making it a versatile method.
  • Cons:
    • Requires significant time investment.
    • Less control over the exterior texture of the meat.

Grilling:

  • Pros:
    • Quick method, imparting a smoky flavor.
    • Achieves a desirable char and crust.
    • Great for premium cuts, emphasizing the meat’s natural flavors.
  • Cons:
    • Risk of drying out if overcooked.
    • Requires constant attention to avoid charring.

Tips for Maintaining Moisture and Tenderness

  1. Marinate First: Marinating venison can introduce additional moisture and flavor, crucial for both slow cooking and grilling. Opt for acidic bases like vinegar or citrus to tenderize the meat further. For inspiration, consider the ground venison recipes which can be adapted for marinating whole cuts.
  2. Low and Slow: When slow cooking, keep temperatures low to prevent the meat from drying out. This method allows the collagen in tougher cuts to break down, enhancing tenderness.
  3. Rest the Meat: After grilling, let your venison rest covered in a warm place. Resting allows the juices to redistribute throughout the meat, ensuring a moist and tender finish.
  4. Don’t Overcook: Venison’s low fat content means it’s prone to drying out. Whether slow cooking or grilling, aim for medium-rare to medium doneness. Use a meat thermometer to ensure perfection without the guesswork.
  5. Baste to Keep Moist: During grilling, baste the venison with a marinade or a suitable fat source to add moisture. This technique also adds an extra layer of flavor, complementing the natural taste of the meat.

Common Questions About Cooking Venison

How to Prevent Gamey Taste?

The gamey taste of venison can be a unique characteristic that many enjoy. However, for those who prefer to minimize this flavor, there are effective methods to consider:

  • Marinating: Soaking venison in a marinade can significantly reduce its gamey taste. Ingredients like vinegar, wine, or citrus juice not only tenderize the meat but also neutralize strong flavors.
  • Milk Soak: Placing the venison in milk overnight can help mellow the gamey notes, thanks to the milk’s enzymes breaking down the meat fibers.
  • Proper Cleaning and Processing: Ensuring the venison is properly cleaned and processed immediately after the hunt can prevent gamey flavors from developing.

Best Side Dishes for Venison Steaks

Venison steaks are a delicacy that pair well with a variety of side dishes. The best sides should complement the rich flavor of the venison without overpowering it. Here are some top choices:

  • Root Vegetables: Roasted root vegetables like carrots, parsnips, and sweet potatoes offer a sweet and earthy balance.
  • Dark Leafy Greens: Sautéed greens such as kale, spinach, or swiss chard provide a nutritious and flavorful complement.
  • Grains and Starches: Quinoa, wild rice, or creamy polenta can serve as excellent bases, absorbing the venison’s juices and enriching the overall dish.
  • Fruit Compotes: A side of blackberry or cherry compote can introduce a delightful sweetness and acidity, cutting through the richness of the meat.

Pairing venison with the right sides can elevate your meal, creating a harmonious balance of flavors that enhance the natural taste of the meat. Whether you’re aiming to reduce the gamey flavor or looking for the perfect side dish, there are numerous ways to enjoy venison to its fullest.

Conclusion

In conclusion, the key to unlocking the full potential of venison lies in mastering both the selection of complementary flavors and the cooking methods that best suit this unique meat. Whether opting for the slow-cooked tenderness that accentuates the meat’s natural richness or choosing to grill for a quicker, flavor-packed meal, understanding the balance between moisture, tenderness, and flavor is paramount. Marinating venison not only imbues it with additional flavors but also tenderizes the meat, making it more succulent. The choice between slow cooking and grilling largely depends on the specific cut of venison and the desired outcome, with each method offering its own set of benefits. Techniques such as not overcooking, allowing the meat to rest, and properly marinating can greatly enhance the venison dining experience. For those looking to dive deeper into venison preparation, resources like UMN Extension’s guide on cooking venison for flavor and safety and Southern Living’s tips on venison cooking offer valuable insights into making the most out of this versatile game meat.

What is the best thing to mix with ground venison?

Introduction to Ground Venison

Venison, the meat of deer, is renowned for its richness in flavor and leanness, making it a prized ingredient in culinary traditions worldwide. Unlike other red meats, venison boasts a lower fat content, which contributes to its lean profile, making it an excellent choice for health-conscious individuals. The versatility of ground venison particularly stands out, offering a plethora of possibilities for both traditional and innovative recipes.

Overview of Venison as a Lean Meat

  • Venison stands out due to its remarkably low fat content, especially when compared to more conventional meats like beef or pork. This characteristic not only enhances its appeal as a healthier alternative but also influences its cooking methods and flavors.
  • The protein-rich nature of venison, coupled with its rich supply of vitamins and minerals, such as iron and B vitamins, underscores its nutritional value.
  • Due to its leanness, venison cooks faster and requires careful handling to prevent overcooking, which can lead to a less desirable, tougher texture.

Benefits of Using Ground Venison in Recipes

Ground venison offers a unique set of advantages for culinary use:

  • Versatility: Its ability to blend seamlessly into a variety of dishes, from burgers and meatballs to sauces and stews, makes it a flexible ingredient in the kitchen.
  • Health Benefits: The lower calorie and fat content, alongside a high protein count, align well with diets focused on lean proteins.
  • Sustainability: Often sourced from wild deer, using venison can be seen as a more environmentally friendly option, contributing to sustainable hunting practices.

What is the Best Thing to Mix with Ground Venison?

When it comes to enhancing ground venison, mixing it with the right ingredients can significantly improve its flavor, texture, and overall appeal in recipes. The key is to complement its lean nature without overpowering its distinct taste.

Fats and Oils

  • Pork Fat: A popular choice, pork fat adds juiciness and flavor, making it perfect for burgers and sausages.
  • Olive Oil: For a healthier option, mixing olive oil into venison can help maintain moisture during cooking.

Flavor Enhancers

  • Bacon: Incorporating bacon not only adds fat but also a smoky flavor that pairs well with venison’s natural taste.
  • Onions and Garlic: These aromatics can be mixed directly into ground venison to deepen the flavor profile of your dishes.

Binding Agents

  • Eggs: Adding eggs can improve the mixture’s binding properties, ideal for meatballs or burgers.
  • Breadcrumbs: They help in retaining moisture and structure, particularly in recipes that require shaping and cooking.

Mixing Ingredients for Flavor and Texture

Enhancing the culinary appeal of ground venison revolves around a strategic selection of ingredients that complement its texture and enrich its flavor. Recognizing the lean nature of venison is crucial in this process, as it dictates the choice of additives that can transform this lean meat into succulent, flavorful dishes. The quest to discover what is the best thing to mix with ground venison leads us through an exploration of fats, flavors, and binding agents that not only augment moisture and taste but also improve the overall culinary experience.

Understanding Venison’s Lean Nature

Venison’s reputation as a lean meat is well-earned, with its low fat content distinguishing it from other more commonly consumed meats such as beef or pork. This leanness, while beneficial for health, poses unique culinary challenges, necessitating creative approaches to cooking and seasoning.

Explaining Why Venison is Leaner Than Other Meats

  • Natural Diet: Deer’s wild, natural diet, rich in grass, leaves, and herbs, contributes to the lean quality of their meat. This diet results in less fat storage compared to animals raised on grain.
  • Active Lifestyle: The constant movement and foraging in the wild keep deer’s muscles toned and fat content low.
  • Genetic Factors: Deer naturally have a lower propensity to store fat, which is evident in the lean cuts of venison available to consumers.

What is the Best Thing to Mix with Ground Venison?

Identifying the ideal mix-ins for ground venison requires balancing its lean texture with ingredients that introduce fat, flavor, and cohesion. Here are several recommendations:

Fats for Juiciness

  • Butter or Ghee: A small addition can introduce rich flavor and moisture.
  • Olive Oil: Ideal for a subtle addition of fat without overwhelming the venison’s natural taste.

Flavor Enhancers

  • Fresh Herbs: Sage, thyme, and rosemary can amplify the natural gamey flavor of venison.
  • Spices: A carefully chosen spice blend can elevate the taste profile significantly.

Binding and Moisture Agents

  • Egg Yolks: Serve as a binder and add richness, compensating for the lean nature of venison.
  • Breadcrumbs or Oatmeal: These absorb moisture, helping to keep the meat tender during cooking.

In the journey to enhance ground venison, the selection of mixing ingredients is pivotal. By incorporating fats, one can introduce much-needed moisture. Flavor enhancers like herbs and spices tailor the taste to suit various palates, while binders ensure the meat maintains its form, enhancing both texture and juiciness. This thoughtful approach not only mitigates the challenges posed by venison’s lean nature but also unlocks a spectrum of possibilities for delicious, healthy, and satisfying meals.

Cooking Tips and Techniques

When it comes to preparing ground venison, understanding the nuances can elevate your dishes significantly. The key lies in mastering the preparation techniques and knowing the perfect mixing ratios for different ingredients. Let’s delve into how you can optimize the texture and flavor of your venison creations.

Preparation Techniques for Mixed Ground Venison

Before you start mixing your venison with other ingredients, it’s crucial to consider the grinding process. Proper grinding techniques can make all the difference in achieving the optimal texture for your dishes. Here are some tips:

  • Select the Right Grinder: Opt for a meat grinder that can handle the lean nature of venison efficiently. A manual grinder offers control, while an electric grinder provides convenience and speed.
  • Grinding Size Matters: For a finer texture, grind your venison twice. Start with a coarser plate and then switch to a finer one. This ensures even mixing and a smoother consistency in the final dish.

Integrating other ingredients into your ground venison not only enhances the flavor but also improves the texture. Venison is notably lean, so adding fat or other meats can provide the moisture it lacks. Consider these mixing ratios for balanced results:

  • Fat Content: Adding about 10-20% fat, sourced from pork or beef, can prevent your venison from becoming too dry. DeliciousChef’s guide on ground venison recipes suggests a ratio that balances flavor and texture without overwhelming the venison’s natural taste.
  • Pork or Beef: Mixing venison with pork or beef enhances the juiciness. A common ratio is 70% venison to 30% pork or beef. This combination works well for burgers, meatballs, and sausages.
  • Bacon Adds Smokiness: For a smoky undertone, consider mixing in a small amount of bacon. A ratio of 90% venison to 10% bacon can introduce a subtle smoky flavor without dominating the dish.

Grinding Techniques for Optimal Texture

The texture of your ground venison can significantly impact the overall mouthfeel of your meals. Achieving the perfect texture requires attention to the grinding process:

  • Chill Your Meat: Always grind venison while it’s partially frozen. This prevents the fat from smearing and ensures a clean cut through the grinder.
  • Speed is Key: Don’t rush the grinding process. A steady pace helps maintain the quality of the grind, leading to a better texture in your cooked dishes.

Mixing Ratios for Different Ingredients

The versatility of ground venison means you can experiment with various ingredients to create a myriad of flavors. Here are some bullet points to guide your mixing:

  • Venison with pork fat – ideal for sausages and meatloaf.
  • Venison with beef fat – perfect for juicy burgers.
  • Pure venison – for a lean, gamey flavor in dishes where the venison’s taste should shine.

Understanding these preparation techniques and mixing ratios allows for endless culinary creativity with ground venison. Whether you’re making a batch of hearty venison burgers or a delicate venison meatloaf, the right approach to preparation and mixing can transform your venison dishes from good to extraordinary.

Recipe Ideas

Ground venison, a lean and nutritious meat, is highly versatile and can be used to create a variety of dishes. From traditional recipes to innovative creations, venison offers a distinctive taste that can be enhanced with the right mix of ingredients. Below are some recipe ideas that highlight the adaptability of ground venison.

Burgers, Meatballs, and Meatloaf

Ground venison provides an excellent base for making burgers, meatballs, and meatloaf, offering a leaner alternative to beef or pork without sacrificing flavor.

  • Venison Burgers: Combine ground venison with a small amount of pork fat for juiciness and season with garlic, onions, and your choice of herbs for a flavorful twist. Consider adding a slice of bacon or a spoon of olive oil to keep the burgers moist. DeliciousChef’s Ultimate Guide to Burgers provides more insights into crafting the perfect venison burger.
  • Venison Meatballs: Mix ground venison with breadcrumbs, parmesan cheese, eggs, and herbs. Bake or fry until golden brown. Serve with pasta or enjoy as a standalone snack.
  • Venison Meatloaf: A mixture of ground venison, onions, bell peppers, breadcrumbs, and a blend of spices, topped with a ketchup and brown sugar glaze, makes for a delicious and comforting meal.

Sauces and Stews

Venison’s rich flavor makes it ideal for hearty sauces and stews, perfect for warming up during the colder months.

  • Venison Chili: Slow-cook ground venison with beans, tomatoes, chili powder, cumin, and your choice of vegetables for a hearty and warming dish.
  • Bolognese Sauce: Replace ground beef with venison in this classic Italian sauce for a leaner option. Simmer with tomatoes, garlic, onions, and herbs for a rich and flavorful sauce.

Healthy Alternatives to Traditional Recipes

Ground venison can also be used to create healthier versions of your favorite recipes.

  • Venison Lettuce Wraps: Sauté ground venison with onions, garlic, and Asian-inspired sauces. Serve in lettuce cups for a low-carb, flavorful meal.
  • Stuffed Bell Peppers: Fill bell peppers with a mixture of ground venison, cooked rice, tomatoes, and spices. Bake until the peppers are tender.

Each of these recipes showcases the versatility of ground venison and how it can be adapted to fit various cuisines and dietary preferences. Whether you’re seeking to replicate traditional dishes or explore new flavor combinations, ground venison offers a nutritious and flavorful base to build upon.

What is the Best Thing to Mix with Ground Venison?

Do you add anything to ground venison?

Yes, adding ingredients to ground venison can enhance its flavor, texture, and cooking properties. Depending on your taste preferences and dietary needs, you might consider mixing in:

  • Fats like beef or pork fat, olive oil, or bacon to add moisture and richness.
  • Aromatics such as onions, garlic, or fresh herbs for depth of flavor.
  • Binding agents like eggs or breadcrumbs to help patties and meatballs hold together.

Why does my ground venison taste gamey?

The gamey taste in ground venison often results from the animal’s diet, age, and the method by which the meat was processed and stored. Factors that can contribute to a stronger gamey flavor include:

  • The deer’s natural diet of wild forage.
  • Lack of proper aging before processing.
  • Improper handling or packaging, which can lead to oxidation.

Is ground venison better for you than ground beef?

Comparing ground venison to ground beef, venison can be considered healthier for several reasons:

  • Lower in calories and fat, making it a leaner meat option.
  • Higher in protein, which is beneficial for muscle building and repair.
  • Contains a rich profile of vitamins and minerals, such as iron and vitamin B12, supporting overall health.

Is venison healthier than beef?

Yes, venison is generally healthier than beef due to its nutritional composition:

  • It’s leaner, with less saturated fat, contributing to better heart health.
  • Provides a good source of vitamins and minerals.
  • Lower in calories, aiding in weight management.

What flavors go with venison?

Venison pairs well with a variety of flavors, both bold and subtle, to complement its rich and slightly gamey profile. Consider using:

  • Sweet elements like cranberry, cherry, or apple to balance the meat’s richness.
  • Earthy herbs such as rosemary, thyme, and sage to enhance its natural flavors.
  • Robust spices, including juniper berries, black pepper, or cloves, for added depth.
  • Acidic components like balsamic vinegar or red wine to cut through the fat and richness.

For more informations and general news about Venison, consider exploring this article.

Conclusion

In exploring the diverse culinary possibilities of ground venison, we’ve uncovered that its lean nature is a canvas awaiting the rich textures and flavors of various mix-ins. From traditional favorites like burgers and meatballs to the heartier realms of stews and sauces, the versatility of venison shines through. Health-conscious cooks can also rejoice in the plethora of healthier alternatives to classic recipes, ensuring that there’s a delicious venison dish for every palate. Embracing these methods not only enhances the culinary experience but also pays homage to the rich heritage of game cooking, making every meal with venison a celebration of flavor, tradition, and innovation.

Ground Venison Recipes: From Burgers to Global Dishes

Introduction to Ground Venison

Ground venison is rapidly becoming a staple in the kitchens of health-conscious cooks and those seeking culinary adventures. This lean meat, primarily sourced from deer, stands out for its rich flavor and versatility in recipes. It’s a fantastic choice for anyone looking to diversify their diet with nutritious options. Ground venison can be used in a plethora of dishes, from traditional burgers and meatballs to more exotic fare like venison tacos and Bolognese sauce. This increase in popularity is partly due to its nutritional profile, offering a high-quality protein source with less fat compared to traditional meats.

The Versatility and Nutritional Benefits of Ground Venison

Ground venison is celebrated for its adaptability in the culinary world. It easily substitutes for other meats in almost any recipe, making it a favorite among those exploring ground venison recipes. But it’s not just its versatility that has cooks turning to venison. Its nutritional benefits are significant:

  • Low in fat: Venison has less fat than beef, pork, and even chicken, making it an excellent choice for a heart-healthy diet.
  • High in protein: It’s an excellent source of lean protein, essential for muscle repair and growth.
  • Rich in vitamins and minerals: Venison contains vital nutrients, including iron, zinc, and B vitamins, contributing to overall health and wellness.

By incorporating ground venison into your diet, you’re not just enjoying delicious meals; you’re also taking a step towards a healthier lifestyle.

Comparison with Other Meats

When it comes to choosing meat for your next meal, it’s worth considering how ground venison stacks up against other options. Here’s a brief comparison:

  • Versus Beef: Ground venison is leaner than most cuts of beef, making it a healthier option. It also has a more distinct flavor, often described as rich and gamey.
  • Versus Chicken: While chicken is known for being a lean protein source, venison surpasses it in terms of iron content and flavor depth.
  • Versus Pork: Pork, especially ground pork, is generally higher in fat than venison. Ground venison offers a leaner, more protein-rich alternative with a unique taste.

This comparison highlights the reasons why ground venison is becoming a preferred choice for many. Its unique combination of nutritional benefits, flavor, and versatility in ground venison recipes makes it stand out from traditional meat options.

By exploring ground venison recipes, you’ll discover a world of flavorful, nutritious dishes that can enhance your dining experience while contributing to a healthier diet. Whether you’re making a simple venison chili or a more elaborate venison lasagna, ground venison offers a delicious and healthful alternative to conventional meats.


Venison Preparation Basics

When embarking on the journey of cooking with venison, particularly when exploring ground venison recipes, understanding the preparation basics is crucial. This segment dives into the essential considerations of grinding your own venison versus opting for pre-ground venison, as well as the importance of fat content in enhancing flavor and texture.

Grinding Your Own vs. Pre-ground

The decision between grinding your own venison and purchasing pre-ground venison can significantly impact the quality and flavor of your dishes. Here’s a breakdown of the two options:

  • Grinding Your Own:
    • Control over Quality: Grinding your own meat ensures you know exactly what’s going into your ground venison, allowing for better quality control.
    • Customization: You can customize the fat content by mixing in a preferred amount of fat from other sources, optimizing the flavor and texture for your ground venison recipes.
    • Freshness: Freshly ground venison is typically more flavorful and tender than pre-ground options that may have been stored for longer periods.
  • Pre-ground Venison:
    • Convenience: Pre-ground venison is ready to use, saving time and effort in preparation.
    • Consistency: It offers consistent quality and fat content, which can be helpful for those new to cooking with venison.

Whether you choose to grind your own venison or opt for the convenience of pre-ground, both options have their merits. The choice depends on your priorities: the desire for control and customization versus the need for convenience and consistency.

Fat Content Considerations

The fat content in ground venison plays a pivotal role in the cooking process, impacting both the flavor and texture of the final dish. Venison is naturally lean, which, while beneficial health-wise, can result in dryer, less flavorful outcomes if not managed correctly. Here are key points to consider regarding fat content:

  • Enhancing Flavor and Juiciness: Adding a small amount of fat to ground venison can significantly improve both the taste and mouthfeel of your dishes. Pork fat or beef fat are popular choices, enhancing the venison’s natural flavors without overpowering them.
  • Ideal Fat Ratios: For most ground venison recipes, a fat ratio of 10% to 20% is recommended. This range strikes a balance between maintaining the lean quality of the venison while ensuring the meat remains moist and flavorful.
  • Health Considerations: While adding fat improves taste and texture, it’s important to consider dietary preferences and restrictions. Adjust the fat content based on your health goals and needs.

Venison Burgers and Meatballs

Diving into ground venison recipes opens up a world of culinary delights, especially when it comes to crafting the perfect venison burgers and meatballs. These dishes offer a fantastic way to enjoy the rich, gamey flavors of venison, blended with various herbs, spices, and other ingredients to create memorable meals. Whether you’re aiming for a classic taste or looking to infuse global influences into your cooking, there’s a venison burger or meatball recipe out there for every palate.


Classic Venison Burger: A Tried and True Recipe

The Classic Venison Burger represents the quintessence of ground venison recipes. Simple yet flavorful, this recipe focuses on:

  • Highlighting the venison’s natural flavors with minimal seasoning, typically involving salt, black pepper, and a touch of garlic.
  • Maintaining moisture by adding a bit of fat, such as pork fat, to counterbalance venison’s lean nature.
  • Serving on a toasted bun with traditional toppings like lettuce, tomato, and your choice of cheese.

This straightforward approach ensures that the rich taste of venison shines through, providing a satisfying and hearty meal.

Southwestern Green Chile Elk Burger

Taking a step into more adventurous territory, the Southwestern Green Chile Elk Burger infuses traditional ground venison recipes with the vibrant flavors of the Southwest. This burger includes:

  • Roasted green chiles for a smoky and slightly spicy kick.
  • Pepper jack cheese to add a layer of creamy spice.
  • A mix of cumin and coriander in the ground venison to deepen the flavor profile.

This burger is a celebration of heat and meat, perfectly capturing the essence of Southwestern cuisine.

Oklahoma Onion Venison Burger

The Oklahoma Onion Venison Burger introduces a beloved diner classic to the world of venison. This recipe is characterized by:

  • Thinly sliced onions pressed into the patty as it cooks, caramelizing and infusing the meat with sweet onion flavor.
  • A simple seasoning blend that lets the venison and onions star.
  • Serving on a soft bun with a smear of mustard for a classic touch.

The result is a savory, juicy burger with a delightful sweetness from the onions, making each bite a balanced taste sensation.

Chorizo and Venison Burgers: A Tex-Mex Twist

Merging the bold flavors of Tex-Mex cuisine with ground venison recipes, Chorizo and Venison Burgers offer a spicy and savory twist. These burgers feature:

  • Ground chorizo mixed with venison for a spicy, fatty contrast.
  • Smoked paprika and chili powder for additional depth and warmth.
  • Topped with avocado and a squeeze of lime to add freshness and cut through the richness.

The combination of venison and chorizo creates a burger that’s bursting with flavor, ideal for those who love a little heat.

Mushroom Swiss Venison Burger: An Umami Delight

The Mushroom Swiss Venison Burger is all about umami, showcasing:

  • Sautéed mushrooms piled atop the burger, enhancing its earthy notes.
  • Swiss cheese for a mild, nutty creaminess that complements the mushrooms.
  • A hint of thyme in the patty, tying the flavors together.

This burger is a rich, decadent option for mushroom lovers, offering layers of complex flavors that satisfy the umami craving.

Traditional and Global Takes on Venison Meatballs

Venturing beyond burgers, venison meatballs offer a versatile canvas for both traditional and global flavors. Whether served with pasta in a classic marinara or infused with spices for an exotic twist, venison meatballs can adapt to any cuisine. Key considerations include:

  • Mixing venison with breadcrumbs and egg for binding and moisture.
  • Experimenting with spices and herbs to match the culinary tradition you’re exploring.
  • Serving in a sauce that complements the meatballs’ flavor profile, whether it’s a simple tomato sauce or a rich, creamy curry.

Italian Classics with a Venison Twist

Italian cuisine, known for its rich flavors and hearty dishes, provides a perfect canvas for the unique taste of venison. Incorporating ground venison recipes into Italian classics introduces a novel twist on beloved dishes, offering a delightful fusion of traditional Italian cooking with the robust, gamey flavors of venison. From ragu to lasagna, venison lends itself beautifully to these recipes, adding a layer of depth and complexity that enhances the overall dining experience.

Venison Ragu: A Hearty Pasta Sauce

Venison ragu transforms the classic pasta sauce into a richer, more nuanced dish. This hearty sauce is characterized by:

  • Slow-cooking ground venison with a mirepoix of onions, carrots, and celery, melding flavors together.
  • Adding red wine and tomatoes to the mix, creating a deep, complex base that complements the venison’s robustness.
  • Serving over wide pasta like pappardelle or tagliatelle, which holds up well to the hearty texture of the ragu.

This venison ragu is a testament to the adaptability of ground venison recipes in traditional Italian cooking, providing a warm, comforting dish perfect for colder months.

Venison Meatloaf: An Italian-American Classic

Venison meatloaf, an Italian-American classic, offers a leaner take on the traditional recipe. It features:

  • A blend of ground venison, breadcrumbs, and Italian herbs, creating a flavorful base.
  • The inclusion of finely chopped garlic and Parmesan cheese, enhancing the meatloaf with Italian flair.
  • A tomato-based glaze, adding a tangy sweetness that balances the venison’s gamey notes.

This version of meatloaf brings a fresh perspective to the dinner table, combining the comforting familiarity of meatloaf with the distinctive taste of venison.

A Unique Take on Lasagna with Venison

Lasagna with venison introduces an exciting variation to the layered pasta dish. This recipe stands out by:

  • Using ground venison in the ragu, offering a leaner alternative to beef or pork without sacrificing flavor.
  • Layering the venison sauce with ricotta, mozzarella, and noodles, ensuring each bite is rich and satisfying.
  • Incorporating fresh basil and oregano, which elevate the dish with bright, aromatic notes.

Venison Meat Pies: A Sicilian Delight

Venison meat pies draw inspiration from Sicilian cuisine, offering a portable and savory pastry. These pies are characterized by:

  • A filling of ground venison, cooked with onions, peas, and tomato paste, enclosed in a flaky pastry crust.
  • The addition of spices like cinnamon and clove, introducing a subtle warmth that complements the venison beautifully.
  • A hand-held format, making these pies a perfect option for gatherings or a satisfying snack.

Venison meat pies celebrate the versatility of ground venison recipes, combining the rich flavors of Sicilian cooking with the unique qualities of venison for a truly memorable dish.

Other Delightful Ground Venison Recipes

Discover a world of flavors with these ground venison recipes. Each dish offers a unique twist on traditional meals, showcasing the versatility and rich taste of venison.

The Ultimate Venison Chili

Dive into the warmth of the ultimate venison chili. This hearty dish combines ground venison with robust spices and simmered to perfection beans. It’s a comfort food that brings a cozy touch to chilly evenings. For a sustainable touch, incorporating venison aligns with Sustainable Hunting Practices, ensuring a meal that’s both delicious and responsible.

  • Ingredients: Focus on fresh, with an emphasis on tomatoes, onions, and a secret blend of chili spices.
  • Cooking Tips: A slow simmer brings out the flavors and tenderizes the venison, making every spoonful a delight.

Venison Pasties: A Cornish Inspiration

Inspired by Cornwall’s traditional hand pies, venison pasties are a delightful treat. Filled with ground venison, potatoes, swede (rutabaga), and onions, these pasties make for a perfect picnic or a quick, satisfying meal.

  • Pasties History: A nod to the Cornish miners who carried these as an easy lunch.
  • Customizing Your Filling: Experiment with vegetables and spices to personalize your pasties.

South African Bobotie: A National Treasure

Bobotie, a well-loved South African dish, offers a tantalizing mix of sweet and savory flavors, featuring ground venison, dried fruits, and a rich curry spice blend, topped with a golden custard layer.

  • Cultural Significance: A reflection of South Africa’s diverse culinary heritage.
  • Serving Suggestion: Best enjoyed with yellow rice and a simple side of chutney.

Venison Potsticker Dumplings

These dumplings are a fusion twist, blending ground venison with Asian flavors. Wrapped in a delicate dough and pan-fried to crispy perfection, they’re a hit at any gathering.

  • Dipping Sauce: A soy-based sauce with a hint of sesame enhances the dumplings’ flavors.

Ground Venison Jerky: A Modern Take on Pemmican

Ground venison jerky is a lean, flavorful snack inspired by pemmican, a Native American provision. This modern take introduces spices that elevate the simple jerky into a gourmet treat.

  • Benefits: A high-protein, low-fat snack that’s perfect for on-the-go energy.
  • Making Jerky: Opt for a dehydrator or a low oven temperature for best results.

Mexican Picadillo: Beyond the Ordinary Taco Meat

Mexican picadillo transforms ground venison into a flavorful concoction with tomatoes, potatoes, and a hint of sweetness from raisins. It’s a versatile filling for tacos, empanadas, or enjoyed on its own.

  • Flavor Profile: A harmonious blend of sweet and savory with a touch of heat.
  • Serving Ideas: Perfect as a filling for stuffed peppers or as a savory pie filling.

Each of these recipes showcases ground venison in a light that’s both traditional and innovative. For more culinary insights and tips, consider exploring Heart-Healthy Game Meat Recipes, enriching your cooking journey with knowledge and heart-conscious choices.

Cooking Without Fat: No-Fat Ground Venison Recipes

Lean and versatile, ground venison is a game changer in the kitchen. Cooking without added fat doesn’t mean sacrificing flavor or texture. Let’s explore how to make the most of lean venison with recipes that highlight its rich taste and health benefits.

Making the Most of Lean Venison

Ground venison thrives in recipes traditionally relying on beef or pork. The key to succulent, flavorful dishes lies in proper seasoning and cooking techniques tailored to preserve moisture and enhance the venison’s natural flavors.

  • Marinating: Introduce a mix of acidic components (like vinegar or lemon juice) and spices to tenderize and flavor the venison.
  • Slow Cooking: Gentle, prolonged heat helps break down the meat’s fibers, ensuring tender, juicy results.
  • Adding Vegetables: Vegetables can add moisture and flavor to venison dishes. Consider incorporating onions, tomatoes, or mushrooms into your recipes.

Recipe Highlights

Chili

A staple in many households, venison chili is a robust dish brimming with spices, tomatoes, and beans. It’s a perfect canvas for ground venison, simmering slowly to meld flavors and tenderize the meat. Opt for a mix of chili powder, cumin, and a touch of chocolate for depth.

  • Tip: Use a slow cooker to achieve a rich, concentrated flavor without the need for added fats.

Ragu

Venison ragu is a hearty sauce that pairs wonderfully with pasta or polenta. This Italian-inspired dish benefits from a low and slow cook, allowing the ground venison to become tender and the sauce to thicken naturally.

  • Tip: Add a splash of red wine for complexity and a hint of sweetness to balance the venison’s gaminess.

Jerky

Making jerky is a fantastic way to preserve ground venison while concentrating its flavors. Season the meat with a blend of soy sauce, Worcestershire, garlic, and your favorite spices, then dry it at a low temperature until chewy but not brittle.

  • Health Benefit: Venison jerky is a great source of lean protein, making it an ideal snack for those on the go.

Picadillo

This Latin American favorite is a flavorful, minced meat dish that’s often served with rice or used as a filling for tacos and empanadas. Capers, olives, and raisins add a unique blend of saltiness and sweetness to the ground venison.

  • Tip: A pinch of cinnamon or cloves can add an unexpected warmth to the dish, enhancing the venison’s natural flavors.

Cooking with ground venison without added fat is not only possible but also incredibly rewarding. These recipes showcase the meat’s versatility and adaptability, proving that healthy choices can also be delicious. Whether it’s a spicy chili, a rich ragu, savory jerky, or a sweet and salty picadillo, venison can do it all with flair and flavor.

For other best flavors and how to prepare some of, check this article about Raspberry Chipotle sauce

“Ground Venison Recipes” FAQs

What is the best thing to mix with ground venison?

To enhance ground venison, consider mixing it with:

  • Fat sources: For juicier recipes, mix venison with bacon, pork fat, or beef fat.
  • Seasonings: Use bold spices like juniper berries, rosemary, and thyme.
  • Vegetables: Incorporate onions, garlic, and mushrooms for added moisture and flavor.

How should ground venison be cooked?

Ground venison should be cooked with care to prevent it from drying out:

  • Low and slow: For dishes like chili or stews, cook venison slowly at a lower temperature.
  • Sear quickly: For burgers or meatballs, cook on high heat to sear the outside and keep the inside moist.
  • Avoid overcooking: Venison is best enjoyed medium-rare to medium.

Is ground venison better for you than ground beef?

Yes, ground venison is often considered healthier than beef due to its:

  • Lower fat content: Venison has less saturated fat.
  • Higher nutrient levels: It’s rich in iron, protein, and omega-3 fatty acids.
  • Lower calorie count: Due to its lean nature, venison contains fewer calories.

Is venison healthier than beef?

Venison surpasses beef in several health aspects:

  • Reduced fat and cholesterol: Beneficial for heart health.
  • Higher in vitamins and minerals: Such as vitamin B12, zinc, and iron.
  • Environmentally friendly: Wild venison is a sustainable meat source.

What flavors go with venison?

Venison pairs well with a variety of flavors:

  • Fruity and sweet: Think cranberries, blueberries, or a balsamic glaze.
  • Earthy and aromatic herbs: Such as rosemary, sage, and thyme.
  • Bold spices: Including juniper, clove, and allspice.

Conclusion

Exploring ground venison recipes unveils a world of culinary possibilities that are not only delicious but also healthful. Venison, with its rich, lean qualities, offers a versatile base for a variety of dishes, from hearty chilis and robust ragus to savory jerky and flavorful picadillos. By understanding how to properly mix, season, and cook venison, home chefs can elevate their cooking, offering dishes that are both nourishing and satisfying. Embracing venison in the kitchen not only diversifies your diet with lower-fat, nutrient-rich options but also contributes to more sustainable eating habits. Whether seasoned with bold spices, paired with sweet and fruity flavors, or mixed with healthy fats for juiciness, venison stands out as a superior choice for those seeking quality and flavor in their meals.

Does hidden valley ranch taste like WingStop ranch?

Introduction and Background

Introduction to Ranch as a Condiment

Ranch dressing, a staple in American kitchens and dining tables, epitomizes versatility and widespread appeal among condiments. Initially crafted in the United States, ranch quickly soared in popularity, securing a beloved spot in culinary preferences. This admiration stems not only from its rich, creamy texture but also from its adaptability across various dishes. With a foundation of herbs, garlic, onion, mayonnaise, sour cream, and buttermilk, ranch dressing offers a tangy and refreshing flavor that enhances everything from salads to hot wings, pizzas, and beyond. Its role extends beyond a mere salad dressing to a dip, spread, and an indispensable ingredient in numerous recipes, showcasing its utility. When pondering, Does Hidden Valley Ranch taste like WingStop Ranch?, one delves into the broader discourse on ranch dressing’s place within American cuisine and its influence on taste preferences. The enduring popularity of ranch, underscored by its inclusion in countless American households and eateries, highlights the condiment’s unique position in the culinary world.

Popularity and Versatility of Ranch Dressing in America

  • Versatility: Ranch dressing’s adaptability is unparalleled. It seamlessly pairs with vegetables, chips, wings, sandwiches, and more, making it a go-to condiment for various culinary applications.
  • Culinary Companion: Beyond its role as a dressing and dip, ranch is a key ingredient in numerous recipes. From casseroles to marinades, its presence elevates the flavor profile of dishes.
  • Cultural Staple: The dressing has transcended its condiment status, becoming a cultural staple in America. Its widespread popularity is reflected in the myriad of ranch-flavored products available on the market.

Given its significance, a common query emerges: Does Hidden Valley Ranch taste like WingStop Ranch? This question underlines a broader discussion about brand variations of ranch dressing and their impact on taste preferences among consumers. Hidden Valley Ranch, recognized as the original ranch dressing, offers a specific flavor profile that has set the standard for what many expect from ranch dressing. On the other hand, WingStop’s ranch, tailored to complement their wings, might offer a distinct taste designed to enhance the flavors of their specific product.

The comparison between Hidden Valley Ranch and WingStop Ranch delves into the nuances of flavor that can vary from one brand to another. It highlights the personal preferences that dictate our condiment choices, illustrating how even a seemingly simple dressing can elicit a wide range of opinions and tastes.

The Contenders: Hidden Valley vs. WingStop Ranch

Understanding the Brands

Hidden Valley and WingStop Ranch represent two titans in the world of condiments, each with its unique appeal. Hidden Valley brings a legacy of being the original ranch dressing, offering a classic taste many love. Meanwhile, WingStop’s ranch, designed specifically for their wings, might provide a richer flavor experience tailored to complement spicy and savory dishes.

Flavor Profile Comparison

Ingredients and Texture
  • Hidden Valley Ranch boasts a smooth, creamy texture with a balanced mix of herbs, garlic, and onion. Its base of mayonnaise, sour cream, and buttermilk creates a versatile dressing.
  • WingStop Ranch, on the other hand, often appears thicker, possibly to cling better to wings. It might emphasize a more robust garlic or onion presence, catering to those who prefer a stronger flavor kick.
Taste Analysis

When comparing the taste profiles, we note several key distinctions:

  • Herbaceous Notes: Hidden Valley tends to offer a subtle, balanced herb taste. WingStop’s ranch might dial up the intensity, possibly using a different herb blend to match their wings’ bold flavors.
  • Creaminess: Both dressings are creamy, but the consistency varies. Hidden Valley aims for versatility across dishes, whereas WingStop’s approach ensures the sauce sticks well to their main product—wings.
  • Tanginess: The tangy aspect of ranch comes from buttermilk and sour cream. Hidden Valley’s tanginess is measured, complementing a wide range of foods. WingStop’s version could tweak this balance to stand out against the savory taste of their wings.

The Role of Personal Preference

Taste tests reveal that preference plays a massive role in determining the “better” ranch. Some individuals lean towards the familiar, comforting taste of Hidden Valley. Others prefer WingStop’s ranch for its ability to enhance the flavors of their spicy wings.

Why Taste Tests Matter

Taste tests are crucial. They offer direct comparisons and highlight individual preferences. Through these tests, fans of ranch dressing explore and articulate what they enjoy about each brand’s unique flavor profile.

Detailed Comparison

Taste Profile Analysis

Breaking Down the Flavors

Hidden Valley Ranch offers a creamy blend, perfect for those who love a smooth, herb-infused dressing. Its key ingredients create a harmonious taste. In contrast, WingStop Ranch stands out with a thicker texture and bold flavors, designed to complement spicy wings.

Key Flavor Differences

  • Herbs and Spices: Hidden Valley focuses on a balanced herb taste. WingStop amps up the flavor to match its wings’ spice levels.
  • Consistency: While both dressings are creamy, Hidden Valley is more fluid, making it a versatile choice for various dishes. WingStop’s ranch is notably thicker, ensuring it adheres well to wings.
  • Tangy Undertones: The tanginess from buttermilk and sour cream is a hallmark of ranch dressing. Hidden Valley maintains a mild tanginess, suitable for diverse culinary uses. WingStop’s ranch might offer a more pronounced tang to stand up against strong flavors.

Personal Preferences in Taste

Preferences vary widely among individuals. Some favor the classic taste of Hidden Valley for its versatility. Others prefer the boldness of WingStop’s ranch, finding it a perfect match for spicy foods.

The Value of Taste Tests

Taste tests shine a light on these differences, allowing individuals to explore and define their preferences. Through direct comparison, it becomes clear that each brand caters to different tastes and culinary scenarios.

Diving Into the Ranch Debate

The debate between Hidden Valley Ranch and WingStop Ranch is more than just a matter of taste—it’s a deep dive into the essence of what makes a ranch dressing truly stand out. Whether you’re a fan of dipping, drizzling, or dousing, understanding the nuances of these two popular dressings can elevate your culinary experience.

Texture and Consistency

The texture and consistency of a ranch dressing significantly affect its versatility and enjoyment. Here’s a closer examination:

  • Hidden Valley Ranch: Known for its smooth, creamy texture that clings perfectly to both snacks and salads. Its consistency is ideal for a wide range of dishes, from a simple salad to a complex appetizer platter.
  • WingStop Ranch: Offers a unique, slightly thicker consistency, making it a favorite for those who prefer a more substantial dip. This texture is especially appealing for wing enthusiasts who desire a dressing that doesn’t slide off their favorite snack.

Explore the full ranch dressing recipe that elevates every meal at Delicious Chef, where culinary adventures begin.

Ingredient Breakdown

A closer look at the ingredients reveals much about the taste and quality of these dressings:

  • Hidden Valley Ranch: Its classic taste comes from a blend of buttermilk, salt, garlic, onion, herbs, and spices. This combination has set the standard for ranch dressings, offering a reliable and familiar flavor profile.
  • WingStop Ranch: Distinguishes itself with a slightly tweaked ingredient list that emphasizes a bolder garlic presence and a balance of herbs that many find irresistibly tangy and robust.

For an in-depth exploration of ranch seasoning, check out What Makes Ranch Seasoning? at Delicious Chef, providing insights into the foundation of ranch flavors.

The Ranch Experience

Whether you gravitate towards the classic appeal of Hidden Valley or the distinctive zest of WingStop Ranch, the choice often boils down to personal preference. However, understanding the texture, consistency, and ingredient makeup of these dressings can guide you towards a more informed and satisfying selection.

Discover the secrets behind WingStop’s distinctive flavor at What Makes WingStop Ranch Irresistible? and dive deeper into why WingStop Ranch might taste different at Why Does WingStop Ranch Taste Different?, offering a glimpse into the crafting of this beloved condiment.

In the world of ranch dressings, both Hidden Valley and WingStop have carved out their niches, each with a loyal following. By delving into the texture, consistency, and ingredients, enthusiasts can appreciate the nuances that make each brand unique, potentially discovering a new favorite or reaffirming their current preference.

Consumer Preferences and Brand Loyalty

How Brand Loyalty and Personal Taste Preferences Influence Perception

When considering the question, Does Hidden Valley Ranch taste like WingStop Ranch?, it’s crucial to recognize the impact of consumer preferences and brand loyalty on perception. These factors play a significant role in shaping our experiences with food, especially with something as beloved as ranch dressing.

The Role of Brand Loyalty
  • Emotional Connections: Many consumers develop a strong emotional connection to a brand, often due to memories associated with the product. This bond can significantly influence their perception of taste.
  • Consistency and Trust: Brand loyalty often stems from a history of consistent quality. Consumers trust their favored brand to deliver the same taste they’ve grown to love, which can bias their opinion when comparing it to another brand.
Influence of Personal Taste Preferences
  • Flavor Profile Affinity: Individual preferences regarding the balance of herbs, creaminess, and tanginess in ranch dressing can affect how one brand compares to another in a consumer’s eyes.
  • Adaptability to Foods: How a ranch dressing complements different foods can also influence preference. Some might prefer the versatility of Hidden Valley, while others appreciate how WingStop’s ranch enhances the flavors of spicy wings.
Perception Shaped by Loyalty and Preference
  • Comparison Bias: When loyal to a particular brand, consumers may enter taste tests with a preconceived notion of which they will prefer, affecting the outcome of such comparisons.
  • New Experiences vs. Comfort: Some consumers seek new taste experiences, which might make them more open to different brands. Others find comfort in the familiarity of their preferred brand’s flavor profile.
The Complex Interplay

The interplay between brand loyalty and personal taste preferences highlights the complexity of answering whether Hidden Valley Ranch tastes like WingStop Ranch. Perception is deeply personal and influenced by various factors beyond the physical taste of the product.

  • Cognitive Dissonance: Consumers experiencing a clash between their brand loyalty and actual taste test outcomes may face cognitive dissonance, leading to a reevaluation of their preferences.
  • Brand Identity and Marketing: How a brand positions itself and communicates with its audience can also influence consumer preferences, sometimes even subconsciously.

Nutritional Comparison: Hidden Valley vs. WingStop Ranch

In our quest to answer “Does Hidden Valley Ranch taste like WingStop Ranch?”, a detailed nutritional comparison sheds light on their health impacts.

Caloric Content and Fat

  • Caloric Content: Both Hidden Valley and WingStop Ranch pack a significant calorie count per serving, a typical trait for creamy dressings. Monitoring serving size is key for calorie-conscious consumers.
  • Fat Content: The creamy allure of ranch comes from its fat content, sourced from oils or dairy. Each brand’s product contributes to daily fat intake, urging consumers to choose wisely based on dietary goals.

Sodium and Additives

  • Sodium Levels: Given ranch’s savory nature, sodium content is noteworthy. It’s essential for those with sodium intake restrictions to consider this in their dietary choices.
  • Additives and Preservatives: The longevity of ranch dressings often involves additives. For those inclined towards cleaner eating, this highlights the value of homemade alternatives.

Seeking healthier alternatives? Visit Sporked’s comparison of Hidden Valley Ranch’s packet versus bottle, offering insights on maintaining flavor while managing health concerns.

Additionally, explore Today’s review of 13 ranch dressings for a balanced look at taste and nutrition across brands.

This nutritional analysis of Hidden Valley and WingStop Ranch aims not just to compare but to inform. By understanding what each dressing brings to the table, consumers can align their choices with their dietary preferences, ensuring their ranch selection enhances their meals without detracting from their health objectives.

Frequently Asked Questions (FAQ)

Can you replicate WingStop Ranch at home?

Yes, you can replicate WingStop Ranch at home with the right ingredients and proportions. Homemade recipes typically involve a mix of mayonnaise, buttermilk, ranch seasoning mix, and sometimes a touch of added spices to mimic WingStop’s unique flavor profile. Key steps include:

  • Mixing high-quality mayonnaise and buttermilk for the creamy base
  • Adding a ranch seasoning blend that includes herbs like dill, parsley, and chives, along with garlic and onion powder
  • Fine-tuning the flavor with additional spices, such as a pinch of paprika or cayenne pepper, to match WingStop’s distinct taste

What makes WingStop Ranch unique?

WingStop Ranch stands out due to its:

  • Thicker Consistency: Designed to cling to wings and enhance their flavor without dripping off.
  • Bold Flavor Profile: A robust blend of spices that complements WingStop’s spicy and savory wings.
  • Signature Recipe: Though the exact recipe is proprietary, fans often cite a perfect balance of creaminess and spice as its hallmark.

The uniqueness of WingStop Ranch lies in its ability to elevate the wing-eating experience, making it a favorite among enthusiasts.

Is Hidden Valley Ranch suitable for all diets?

Hidden Valley Ranch may not be suitable for all diets due to its ingredients. Considerations include:

  • Dairy Content: Traditional recipes contain dairy products like buttermilk, sour cream, or mayonnaise, which are not suitable for vegan or some lactose-intolerant diets.
  • Gluten Concerns: While many Hidden Valley Ranch products are labeled gluten-free, individuals with celiac disease or gluten sensitivity should verify product labels.
  • Low-Carb and Keto Diets: Some Hidden Valley Ranch products may fit into low-carb or keto diets, but it’s essential to check the nutritional information for carbohydrate content.

Hidden Valley offers a variety of ranch dressings, including options that cater to specific dietary needs, such as no-dairy or lower-calorie versions, making it versatile for different dietary preferences.

Conclusion

In conclusion, the exploration into whether Hidden Valley Ranch tastes like WingStop Ranch reveals more than just flavor nuances. It underscores the importance of understanding the nutritional content and health implications of our condiment choices. Both brands offer unique taste experiences that cater to diverse preferences, yet each comes with its caloric, fat, sodium, and additive considerations. For health-conscious consumers, this comparison not only illuminates the distinct qualities of each ranch dressing but also highlights the significance of informed dietary choices. By delving into the ingredients, consumers can navigate their options more wisely, ensuring that their enjoyment of these popular dressings aligns with their nutritional goals. Whether opting for the classic appeal of Hidden Valley, the robust zest of WingStop, or seeking healthier alternatives, this analysis serves as a guide for making choices that complement a balanced diet without compromising on taste.

What is raspberry sauce made of? Discover All The Tips

Complete Guide to Chicken of the Woods Recipe